How To Replace a Chaise Lounge Sling
If your sling chaise lounge looks like the picture above, it’s time to replace it and give new life to your furniture. For some, this means finding a repair shop to get it repaired, and if you need help choosing the best repair shop around you check out this article.
For those who are visual learners we created a video of how to replace a chaise lounge sling that you can watch HERE.
Lets start with our tutorial!
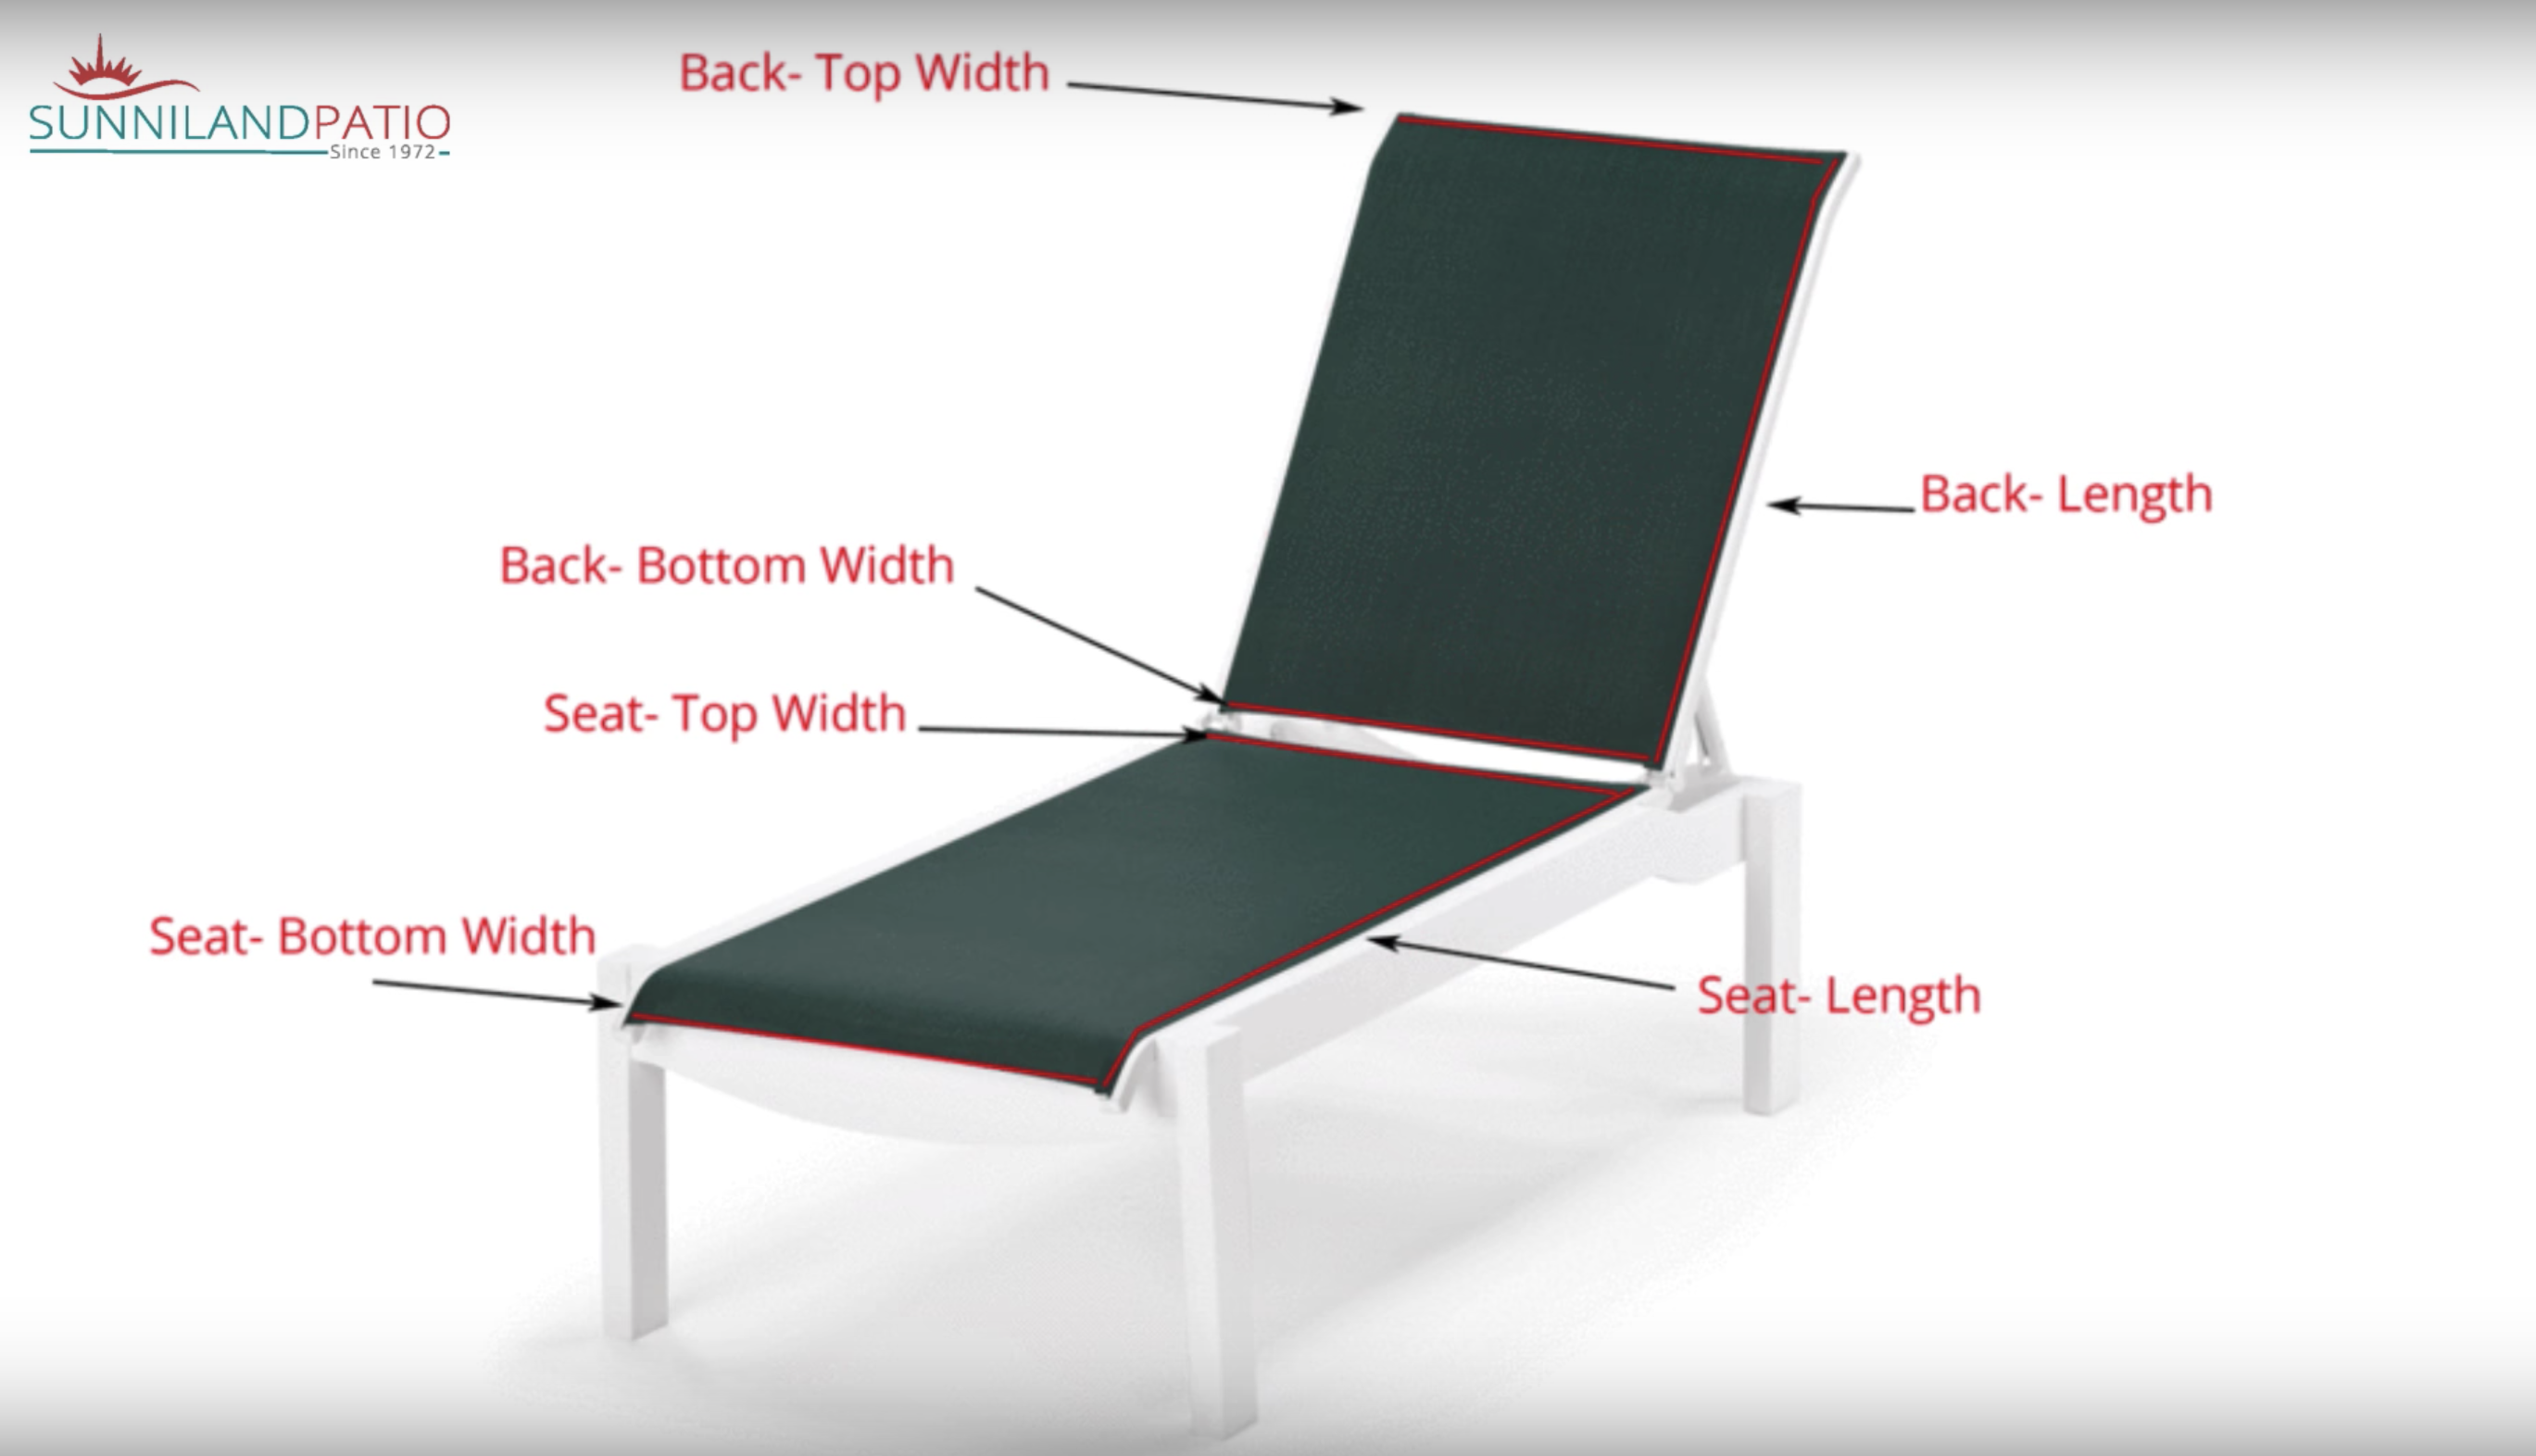
Step 1- Measure The Old Sling
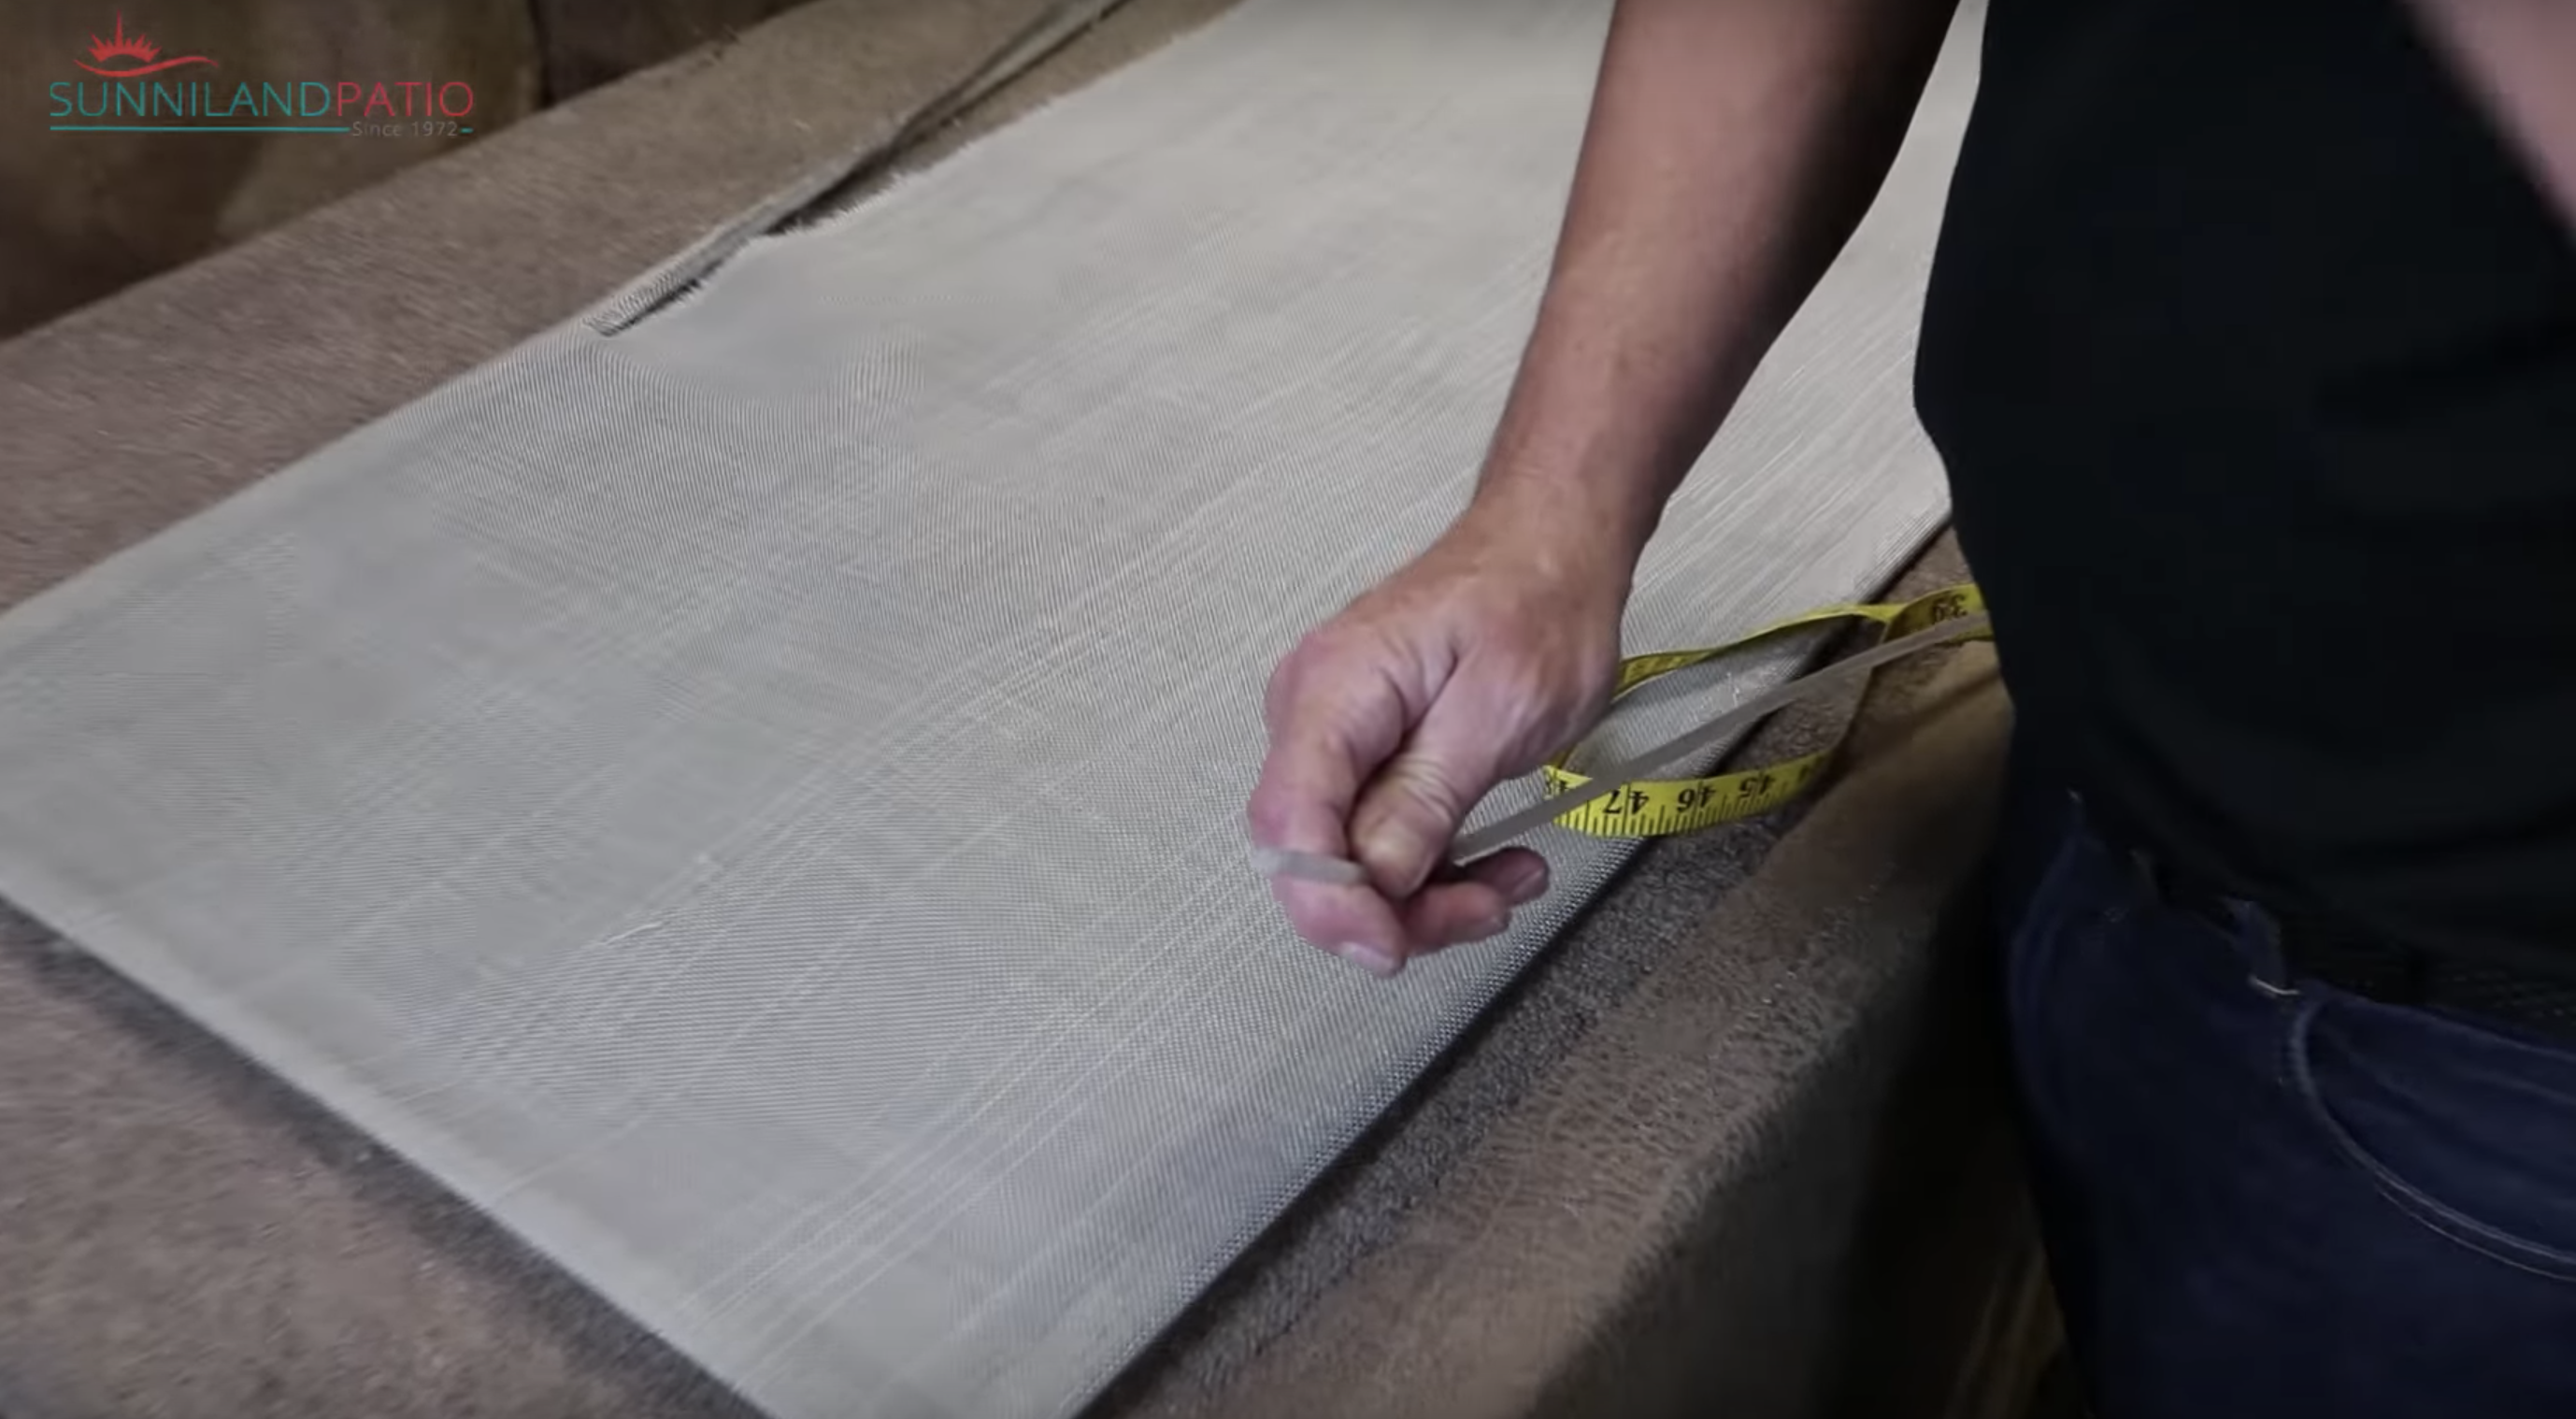
Lets start by measuring the old sling without removing it from the frame so that you can know what measurements to order the new sling with. We are measuring the visible portion of the fabric while it is installed- do not bother trying to estimate how much goes inside of track- it is unnecessary. In the picture below, take a look at the areas that you should be measuring:
Step 2- Remove the Old Sling
To get started removing the old sling, first remove the end caps with a flat head screw driver and save them for after youve installed the new sling so that you dont have to buy new ones. Make sure you remove them carefully so you dont break them.
If the old end caps are too old and you need new ones, heres where you can get them: End Caps.
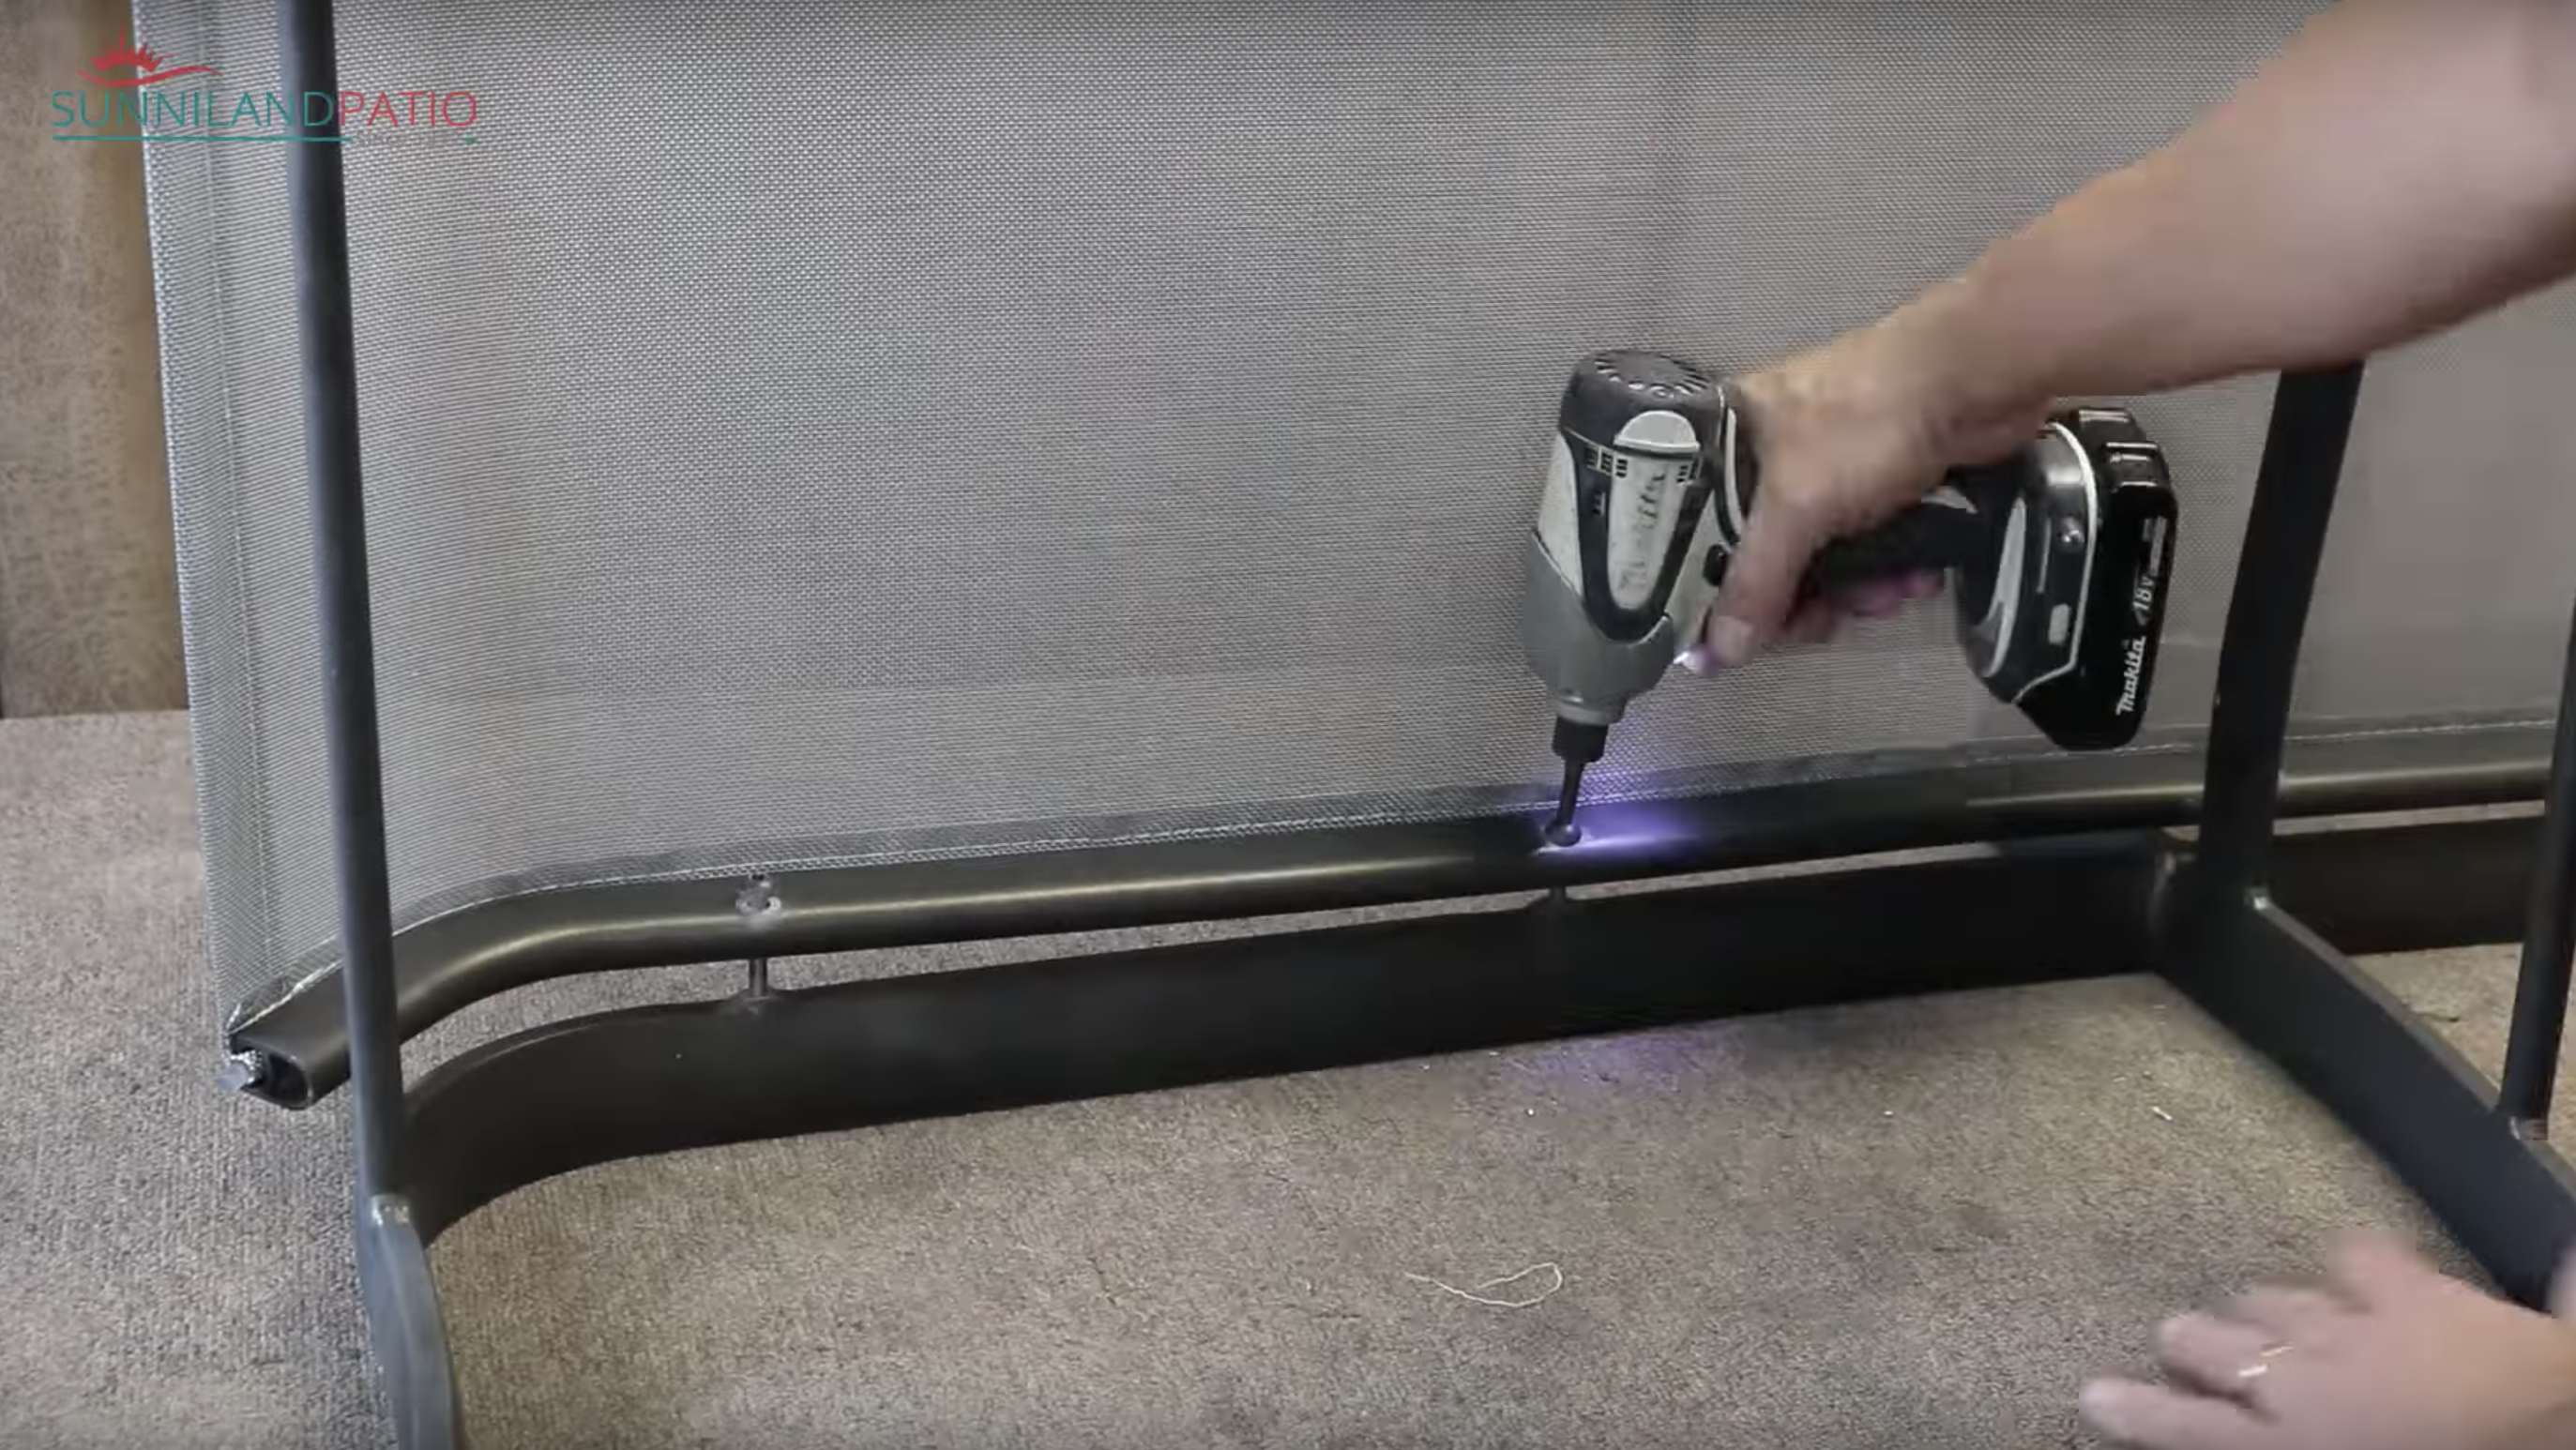
In order to remove the old sling, we need to do it in two different sections, the seat portion and then the back portion. Position the sling chaise lounge on its side and start to remove the back frame of the furniture by unscrewing the side screws as shown in the picture below. Make sure you save all the lose parts when you remove them and set aside the back frame to be able to work on the seat sling properly.
Next, release the hardware that holds the side of the seat sling, as seen in the picture below. We only need to remove one rail in order have room to install and uninstall the sling.
Next we take off the sling from the back frame of the lounge. The back frame has spring braces that stretch it tight, therefore we need to use clamps as seen in the picture below to reduce the tension of the sling.
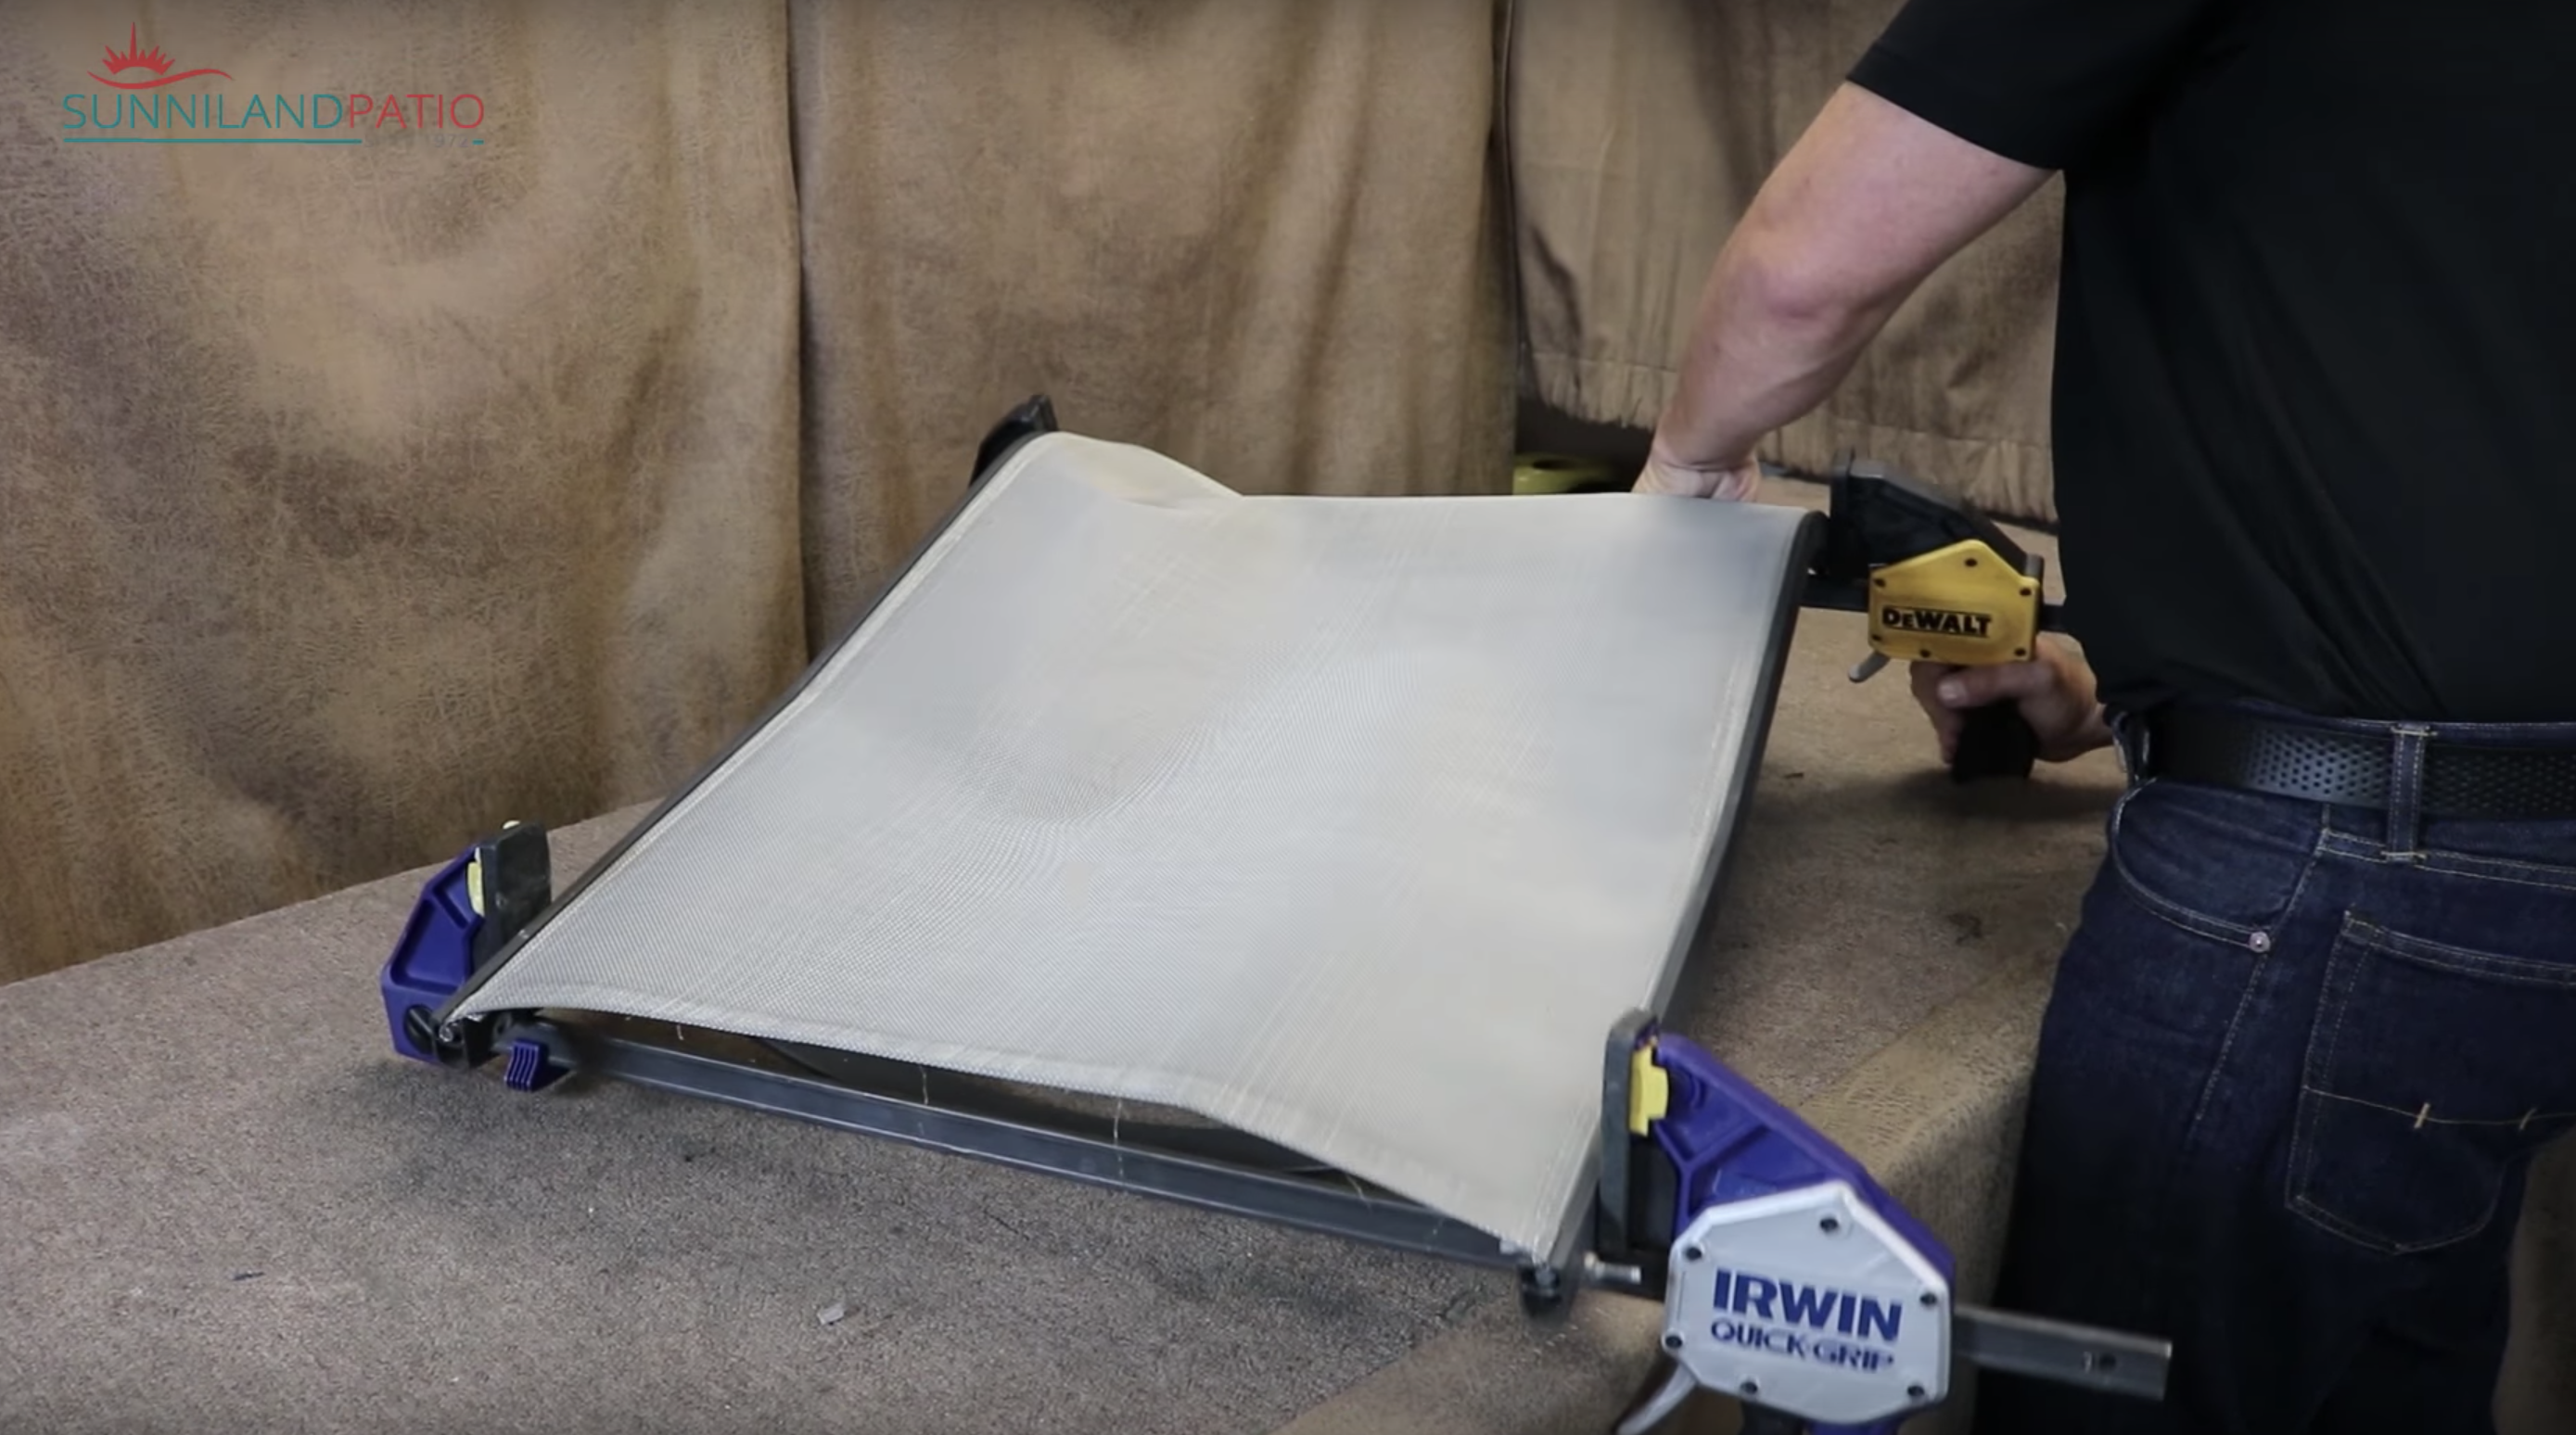
Then just slide the sling right out of the frame!
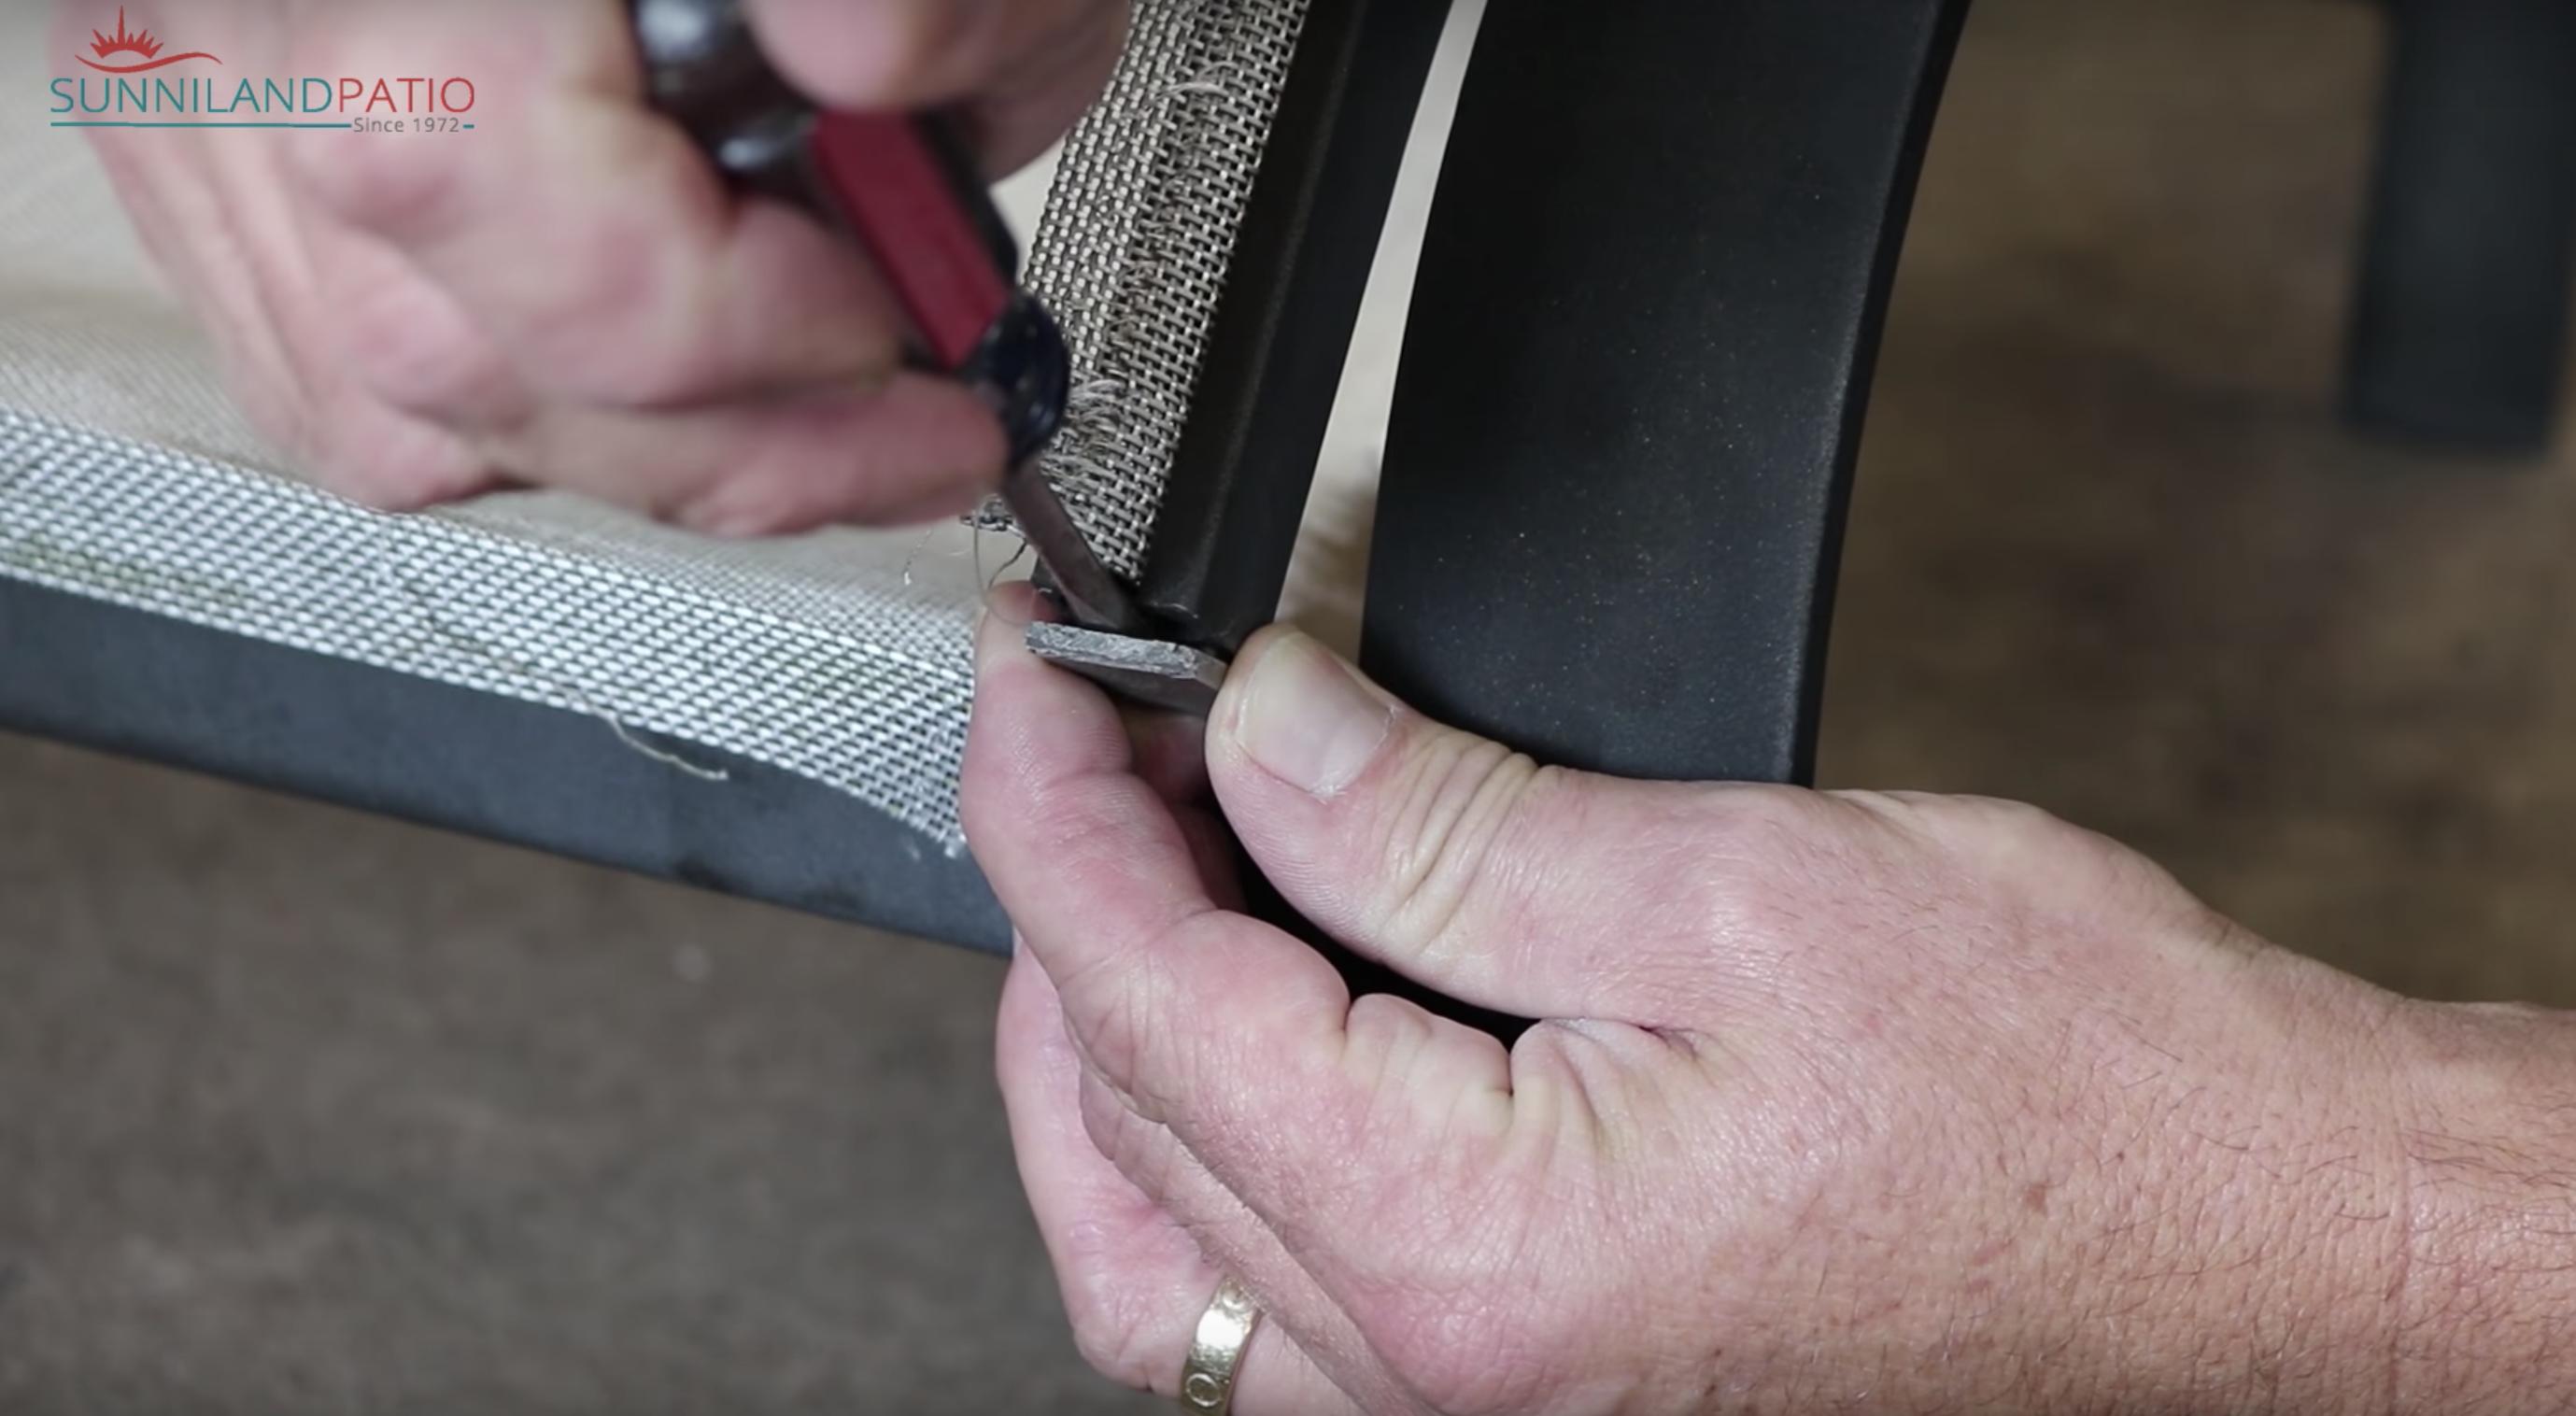
Lastly, make sure to remove the plastic dowels so that you can measure them as well. Its simple, just compare the width of the dowel with that of a drill bit and you get an estimate of what size it would be. These plastic dowels usually come included with the slings and theres two sizes: 7/32 and 1/4.
Step 3- Install the New Sling
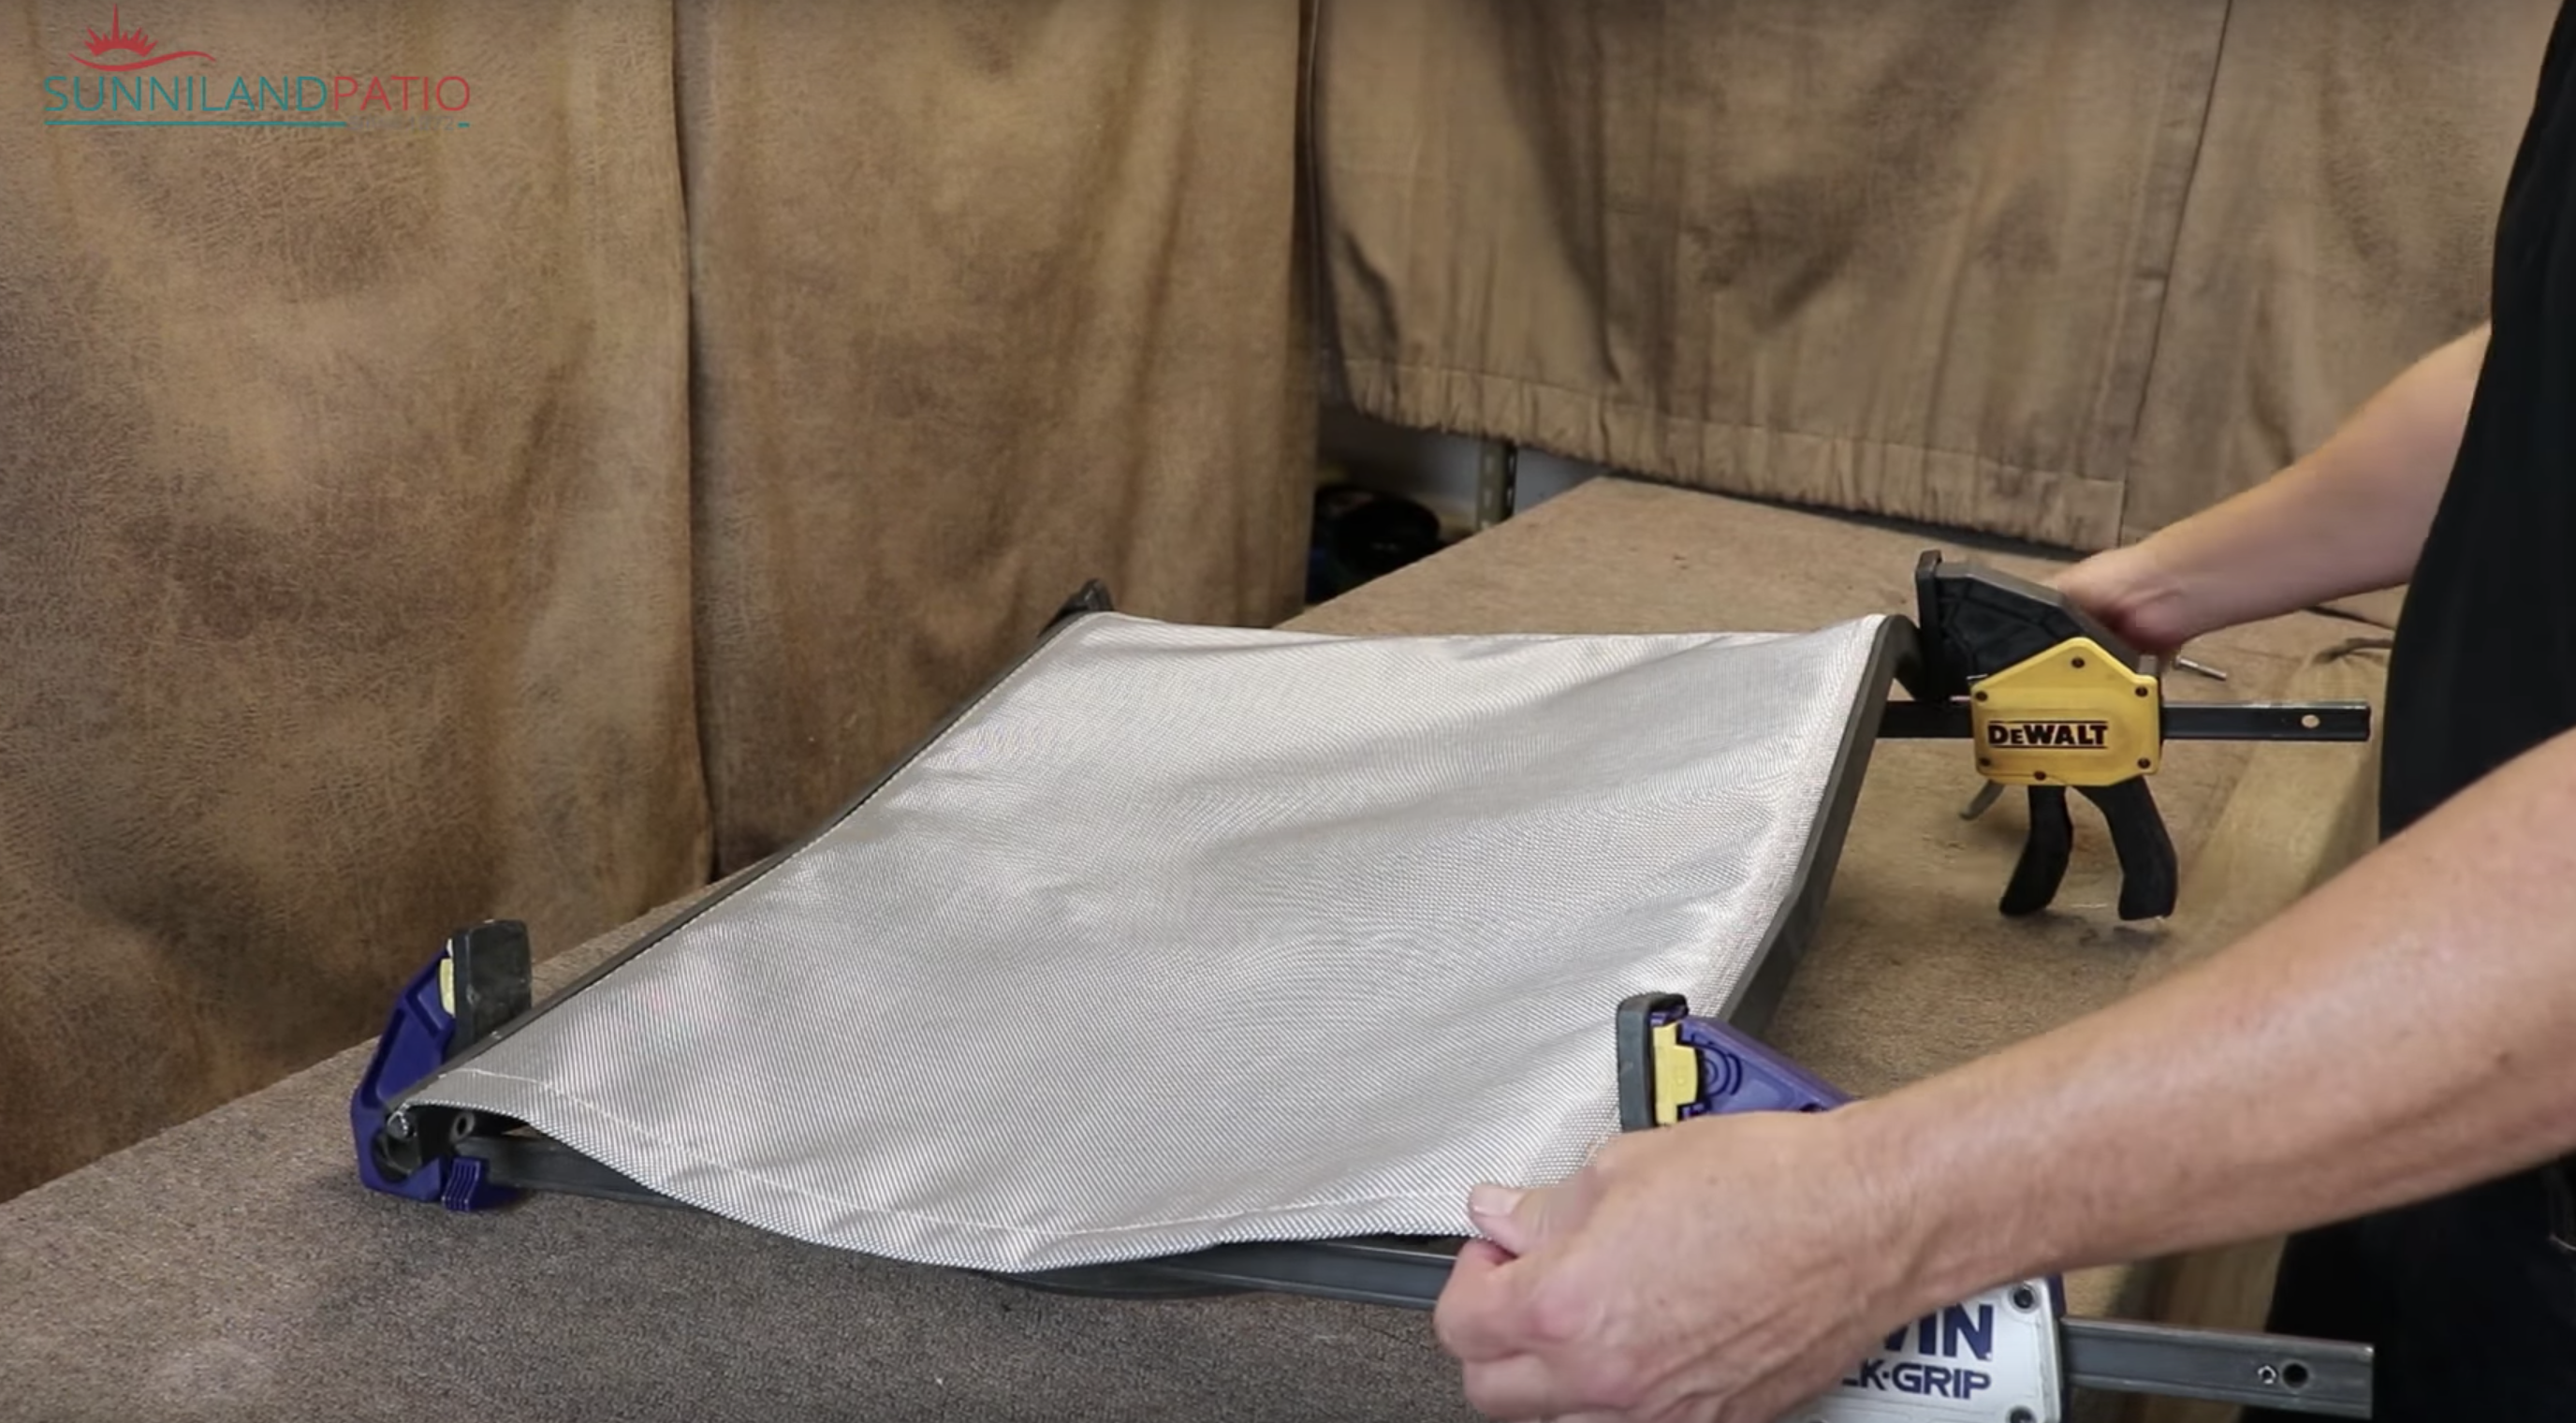
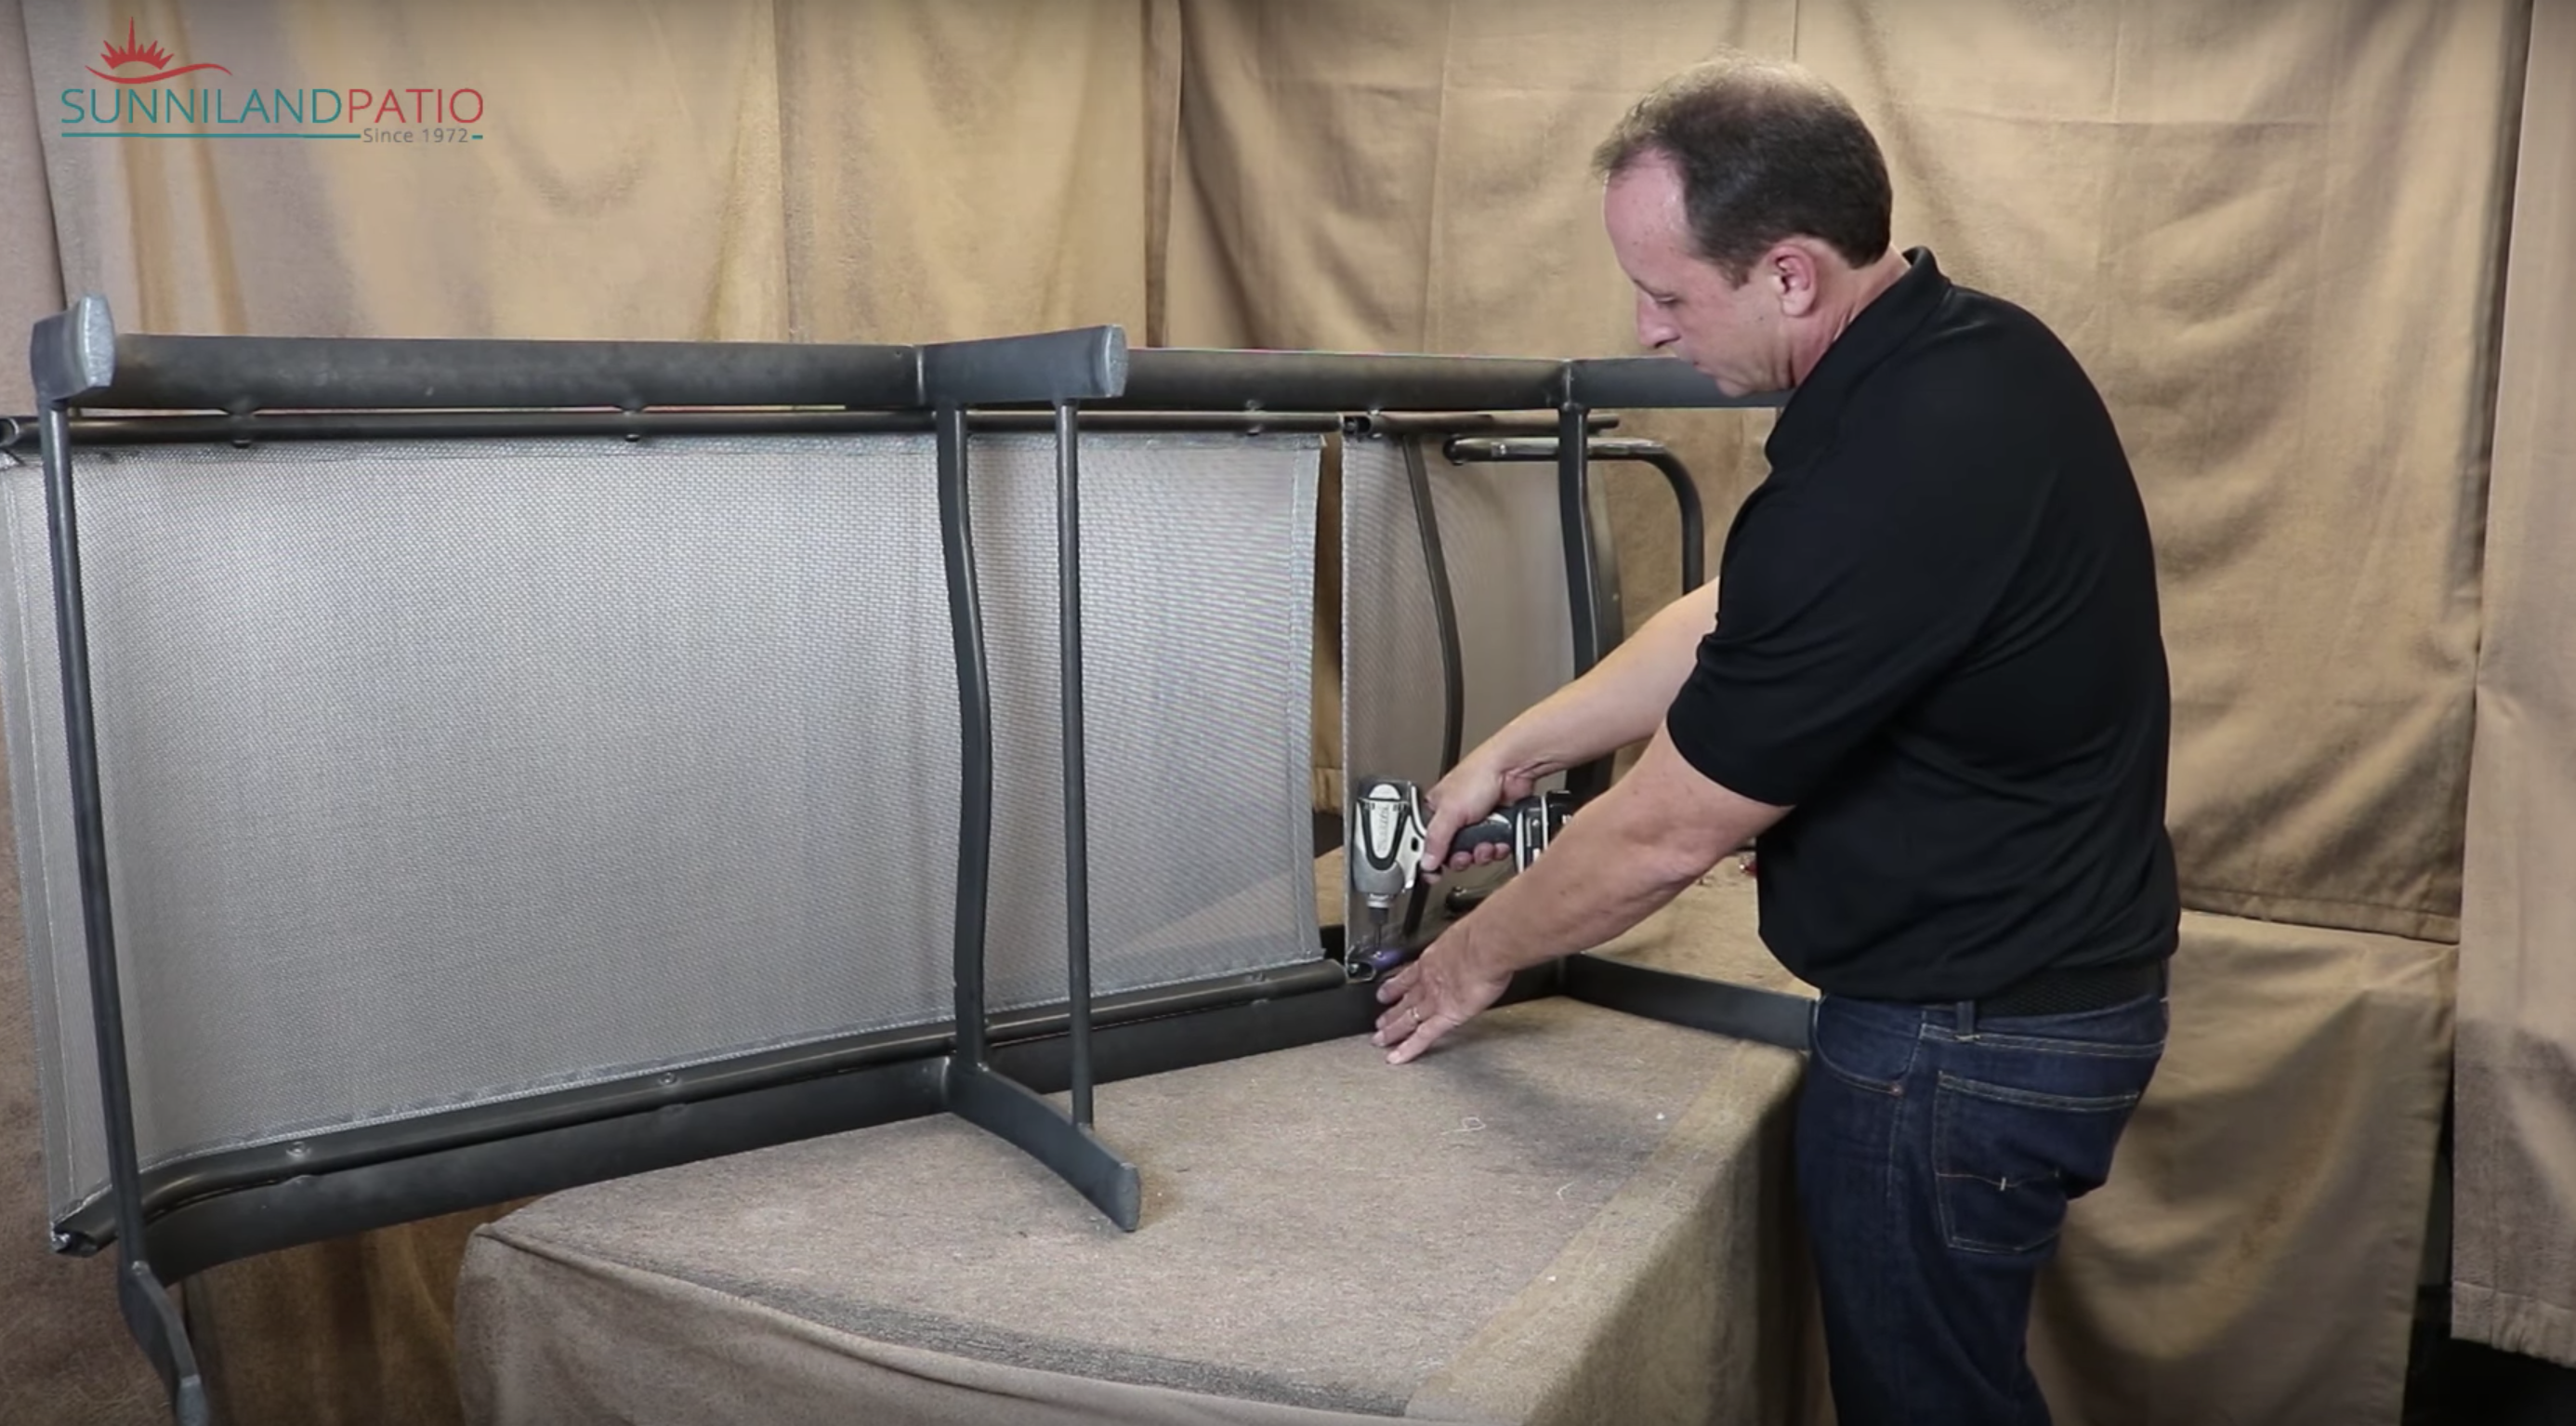
Once your new ordered slings have arrived, we install them starting with the back sling first. Make sure you add the two clamps you had before so that you can easily slip the new sling in the rails as shown below. Right before you release the clamps make sure to have your fabric all the way to the edge of the rail so it's nicely positioned and firm when you do release them.
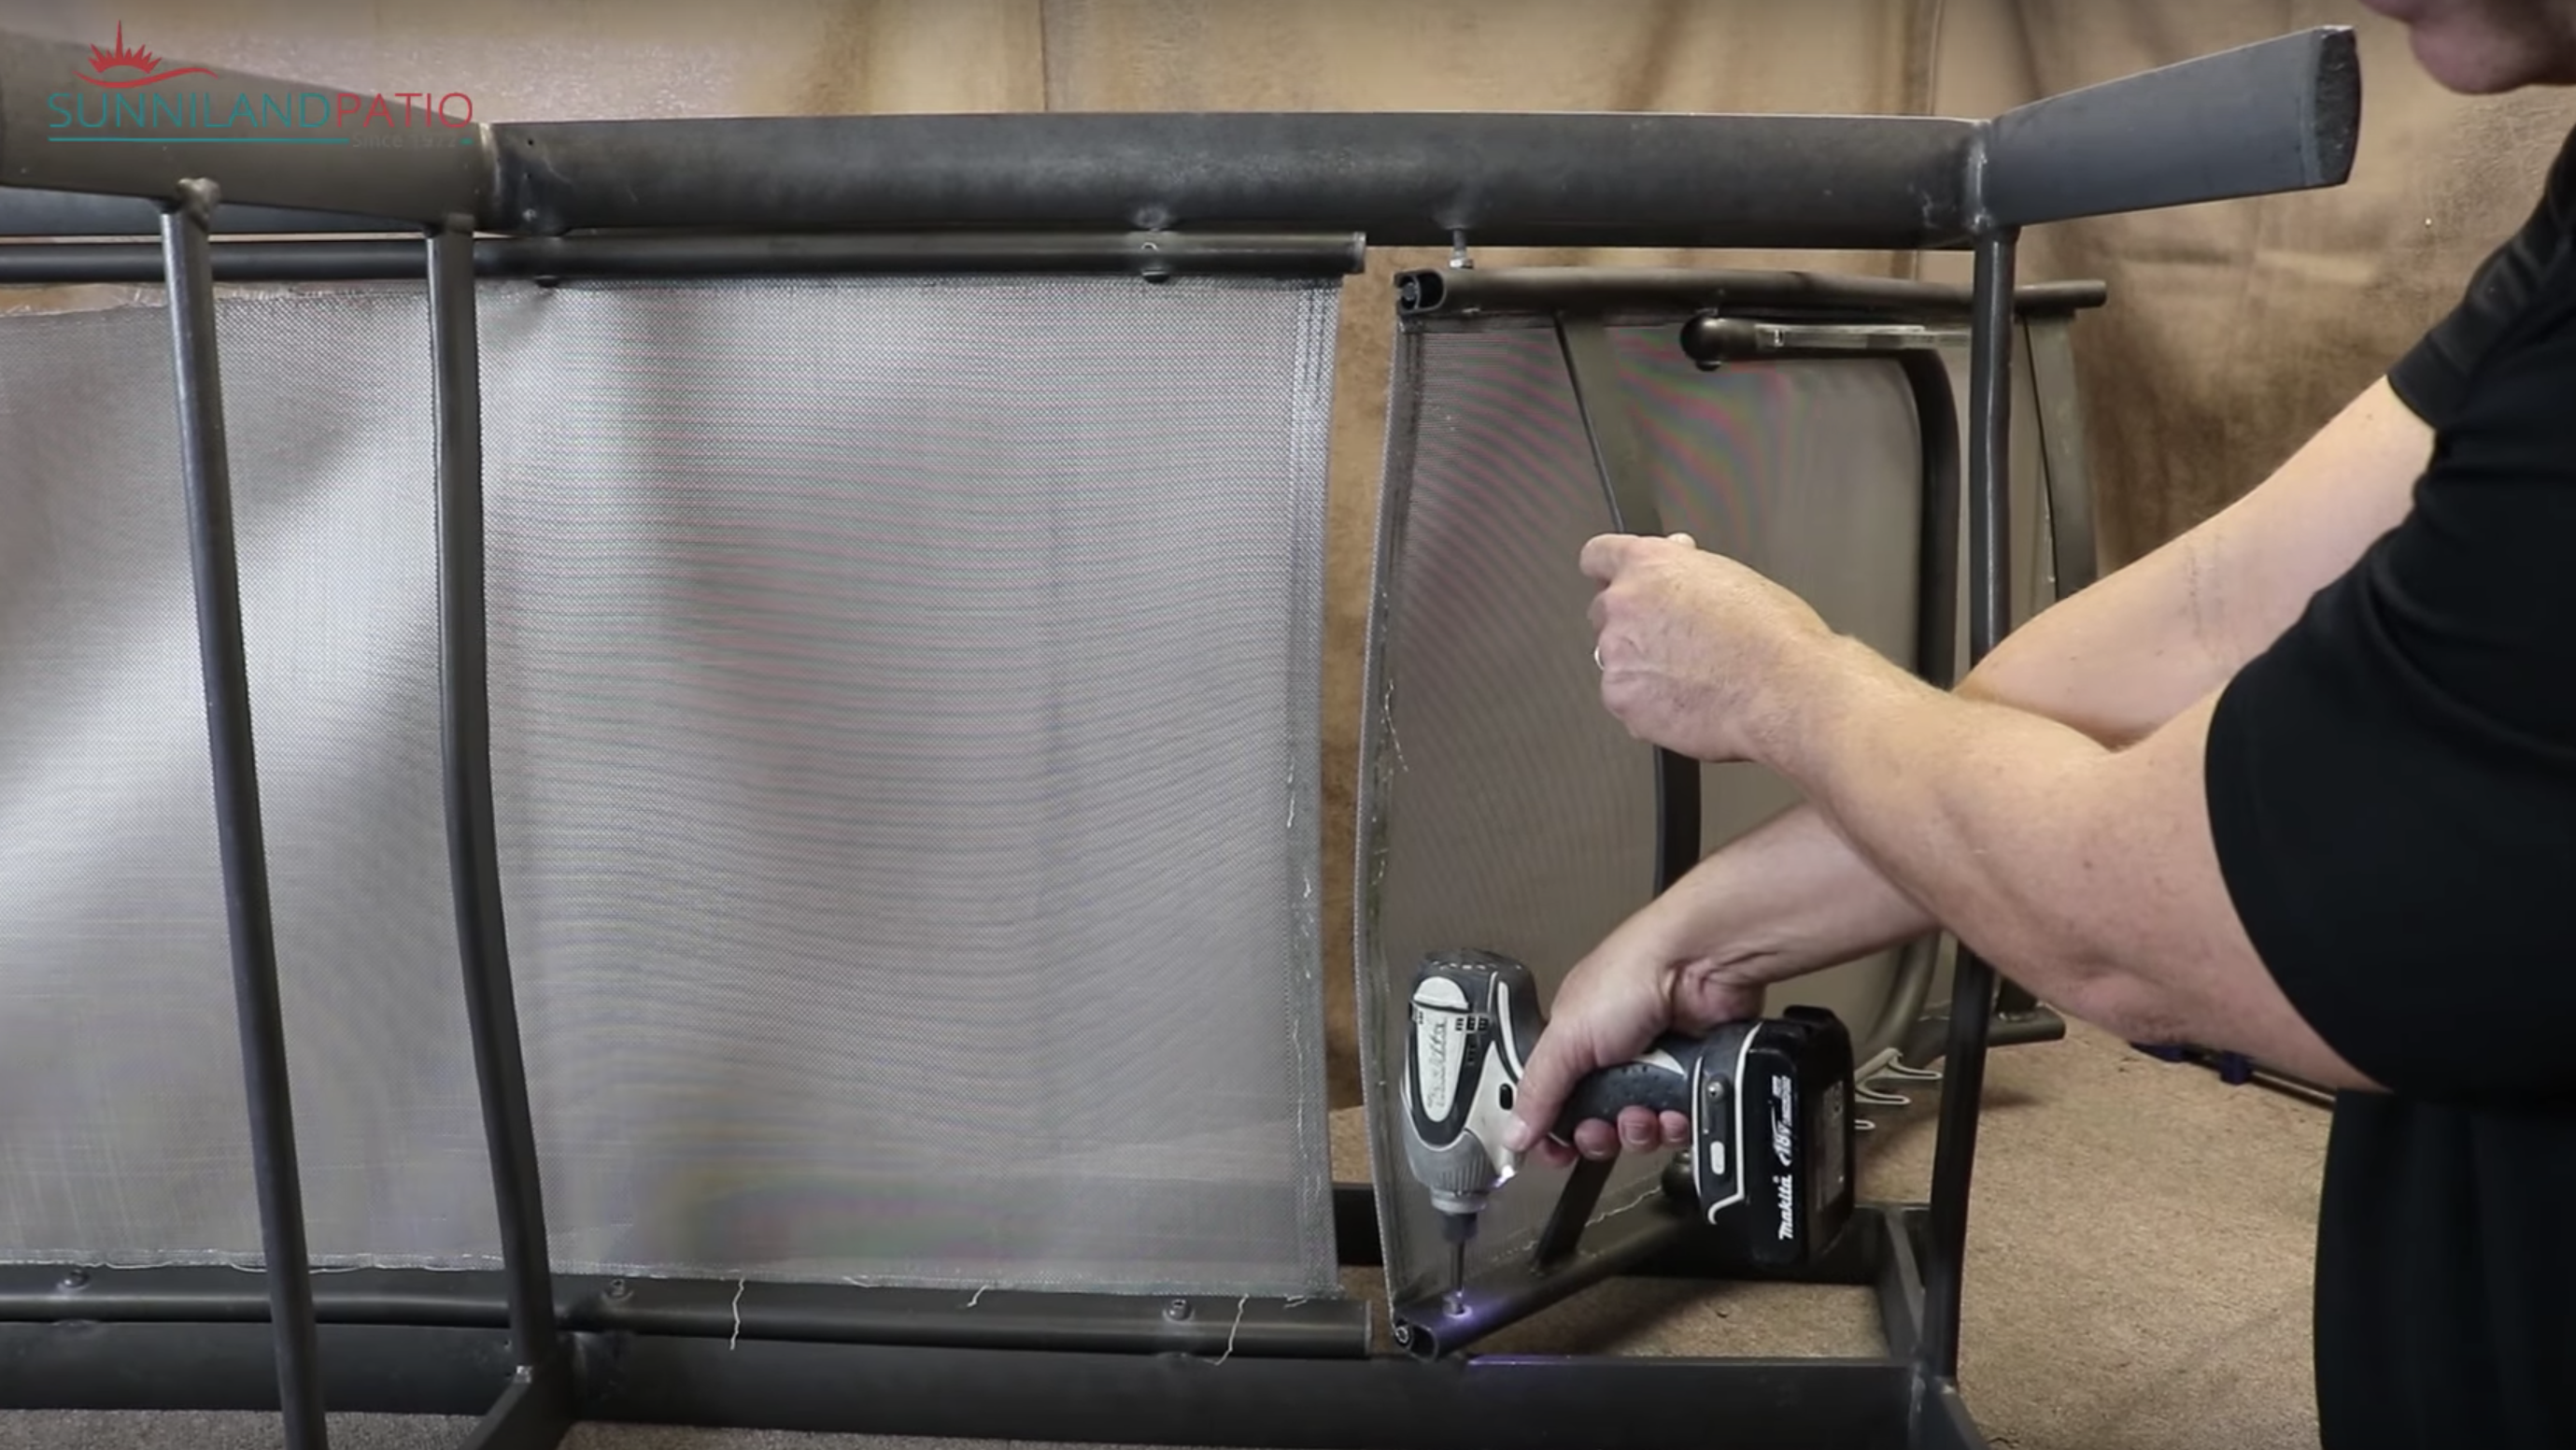
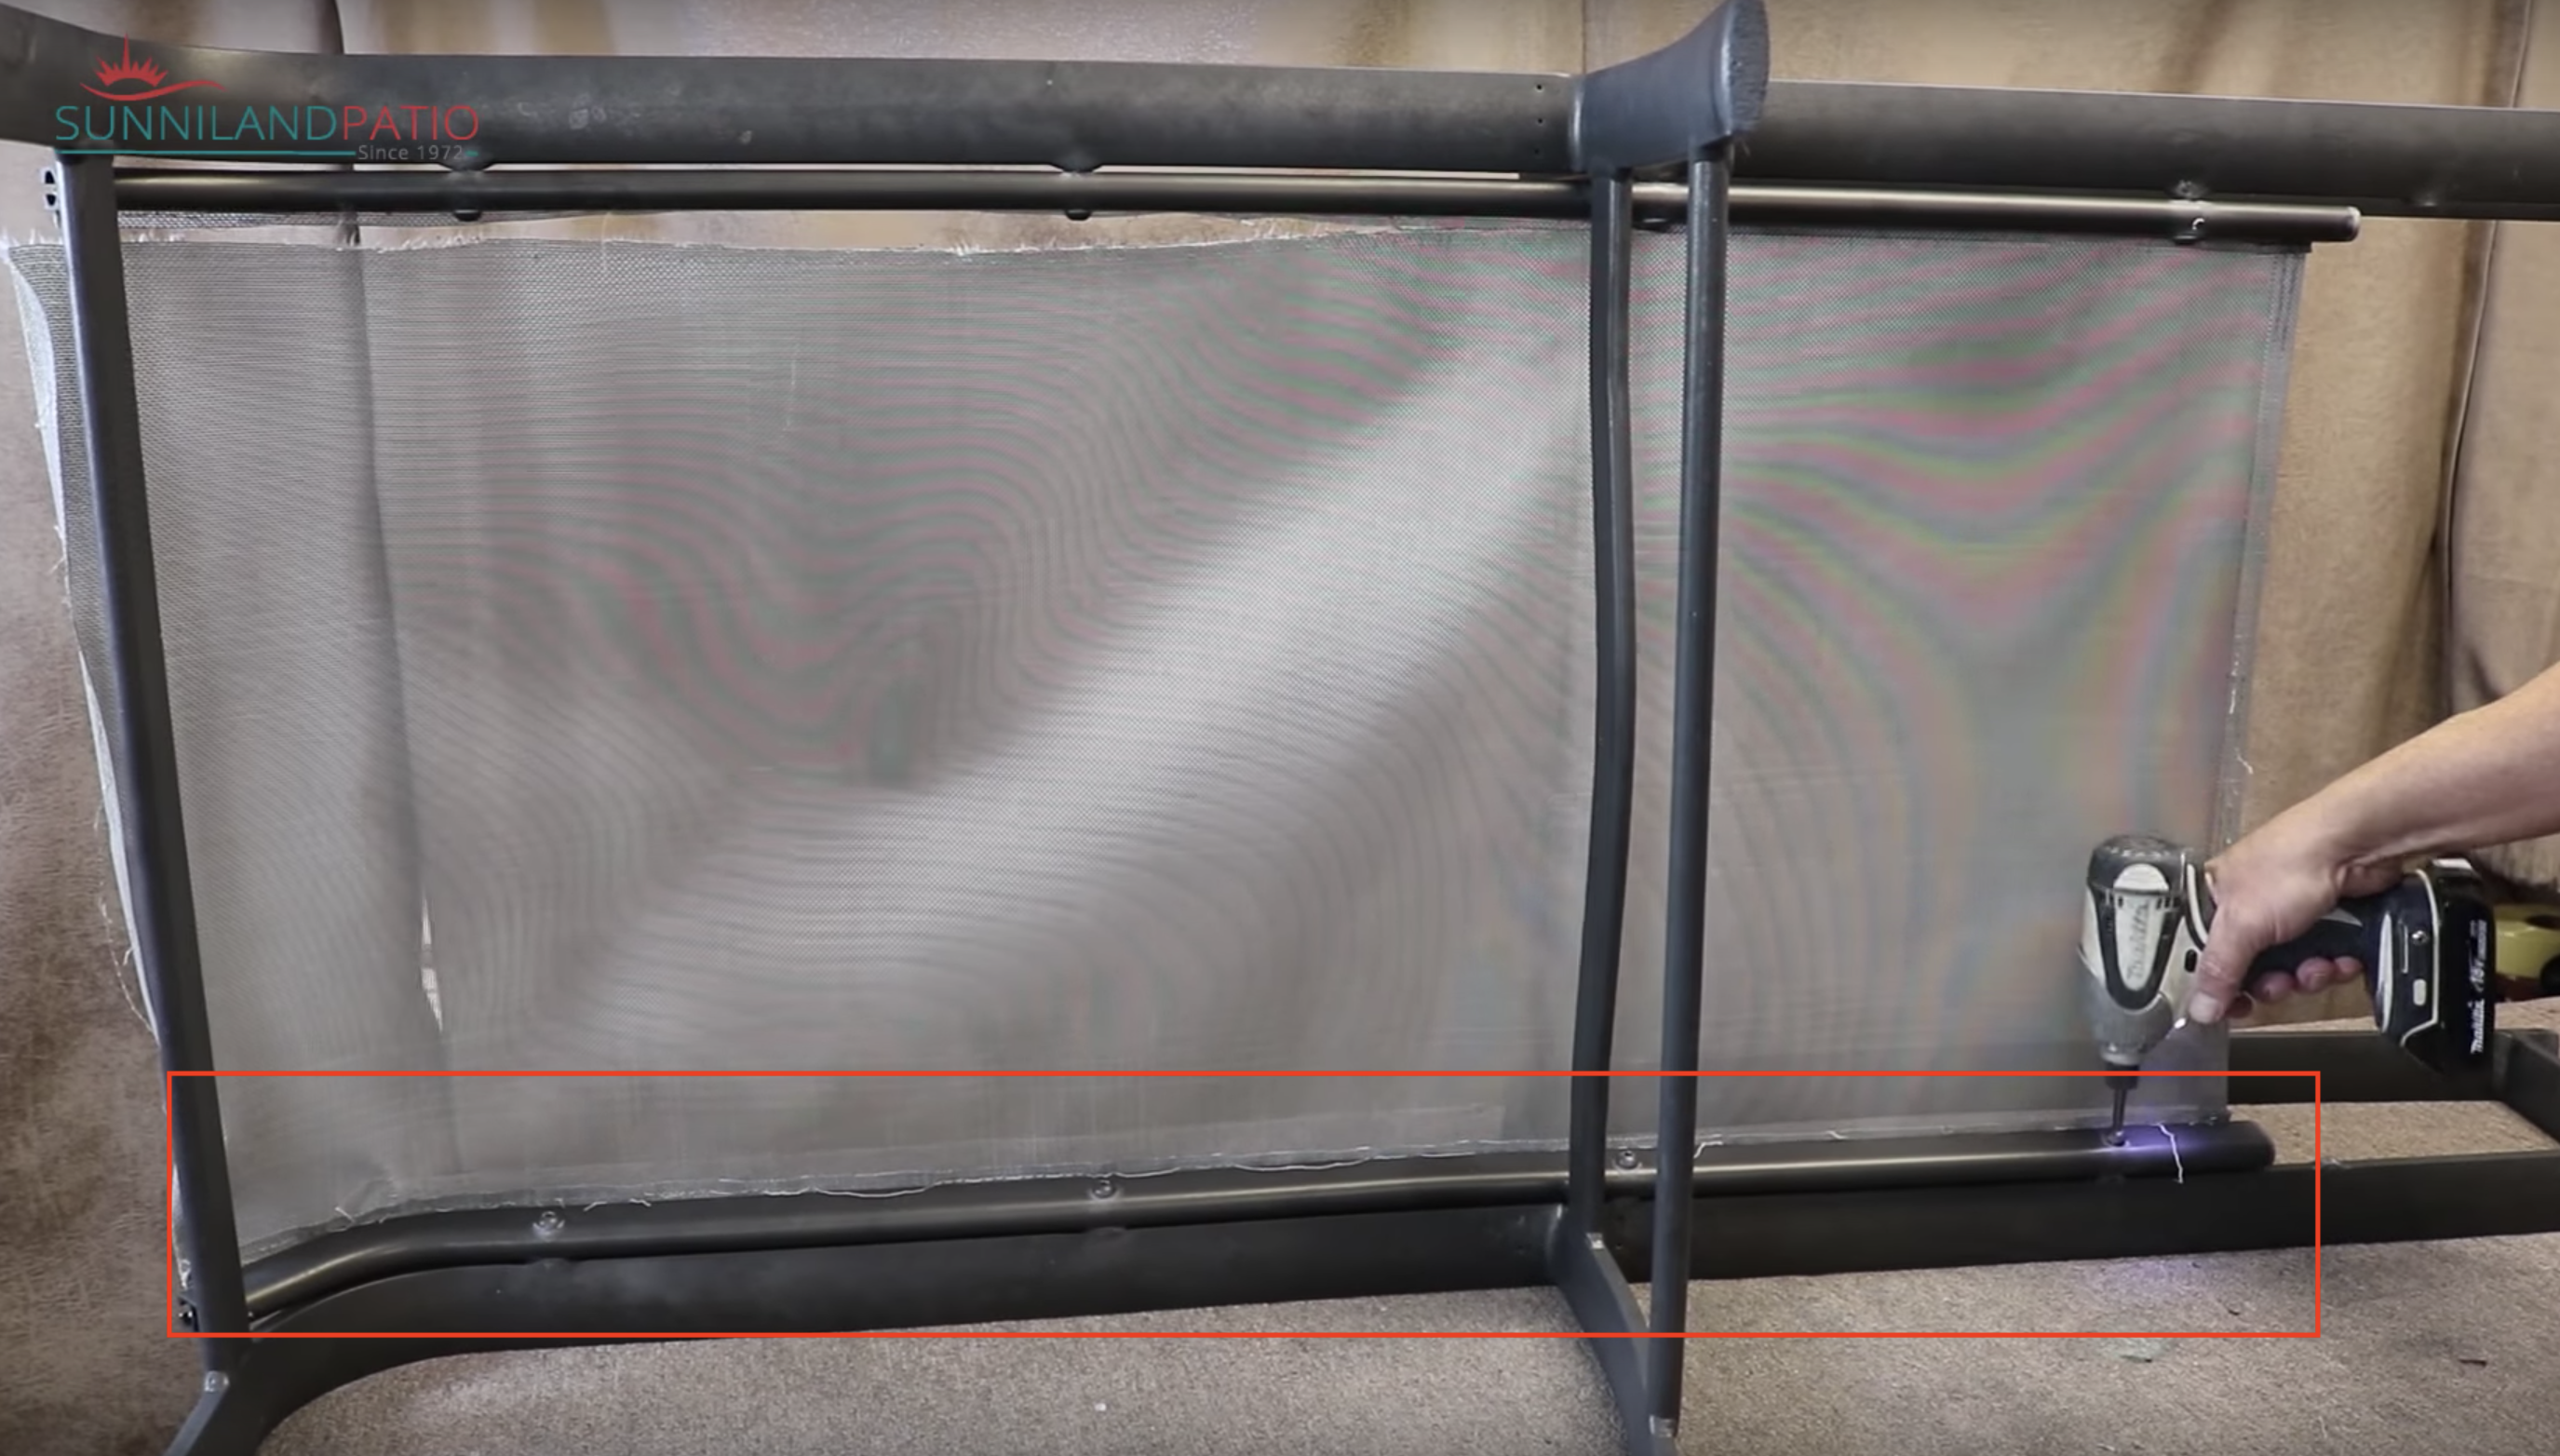
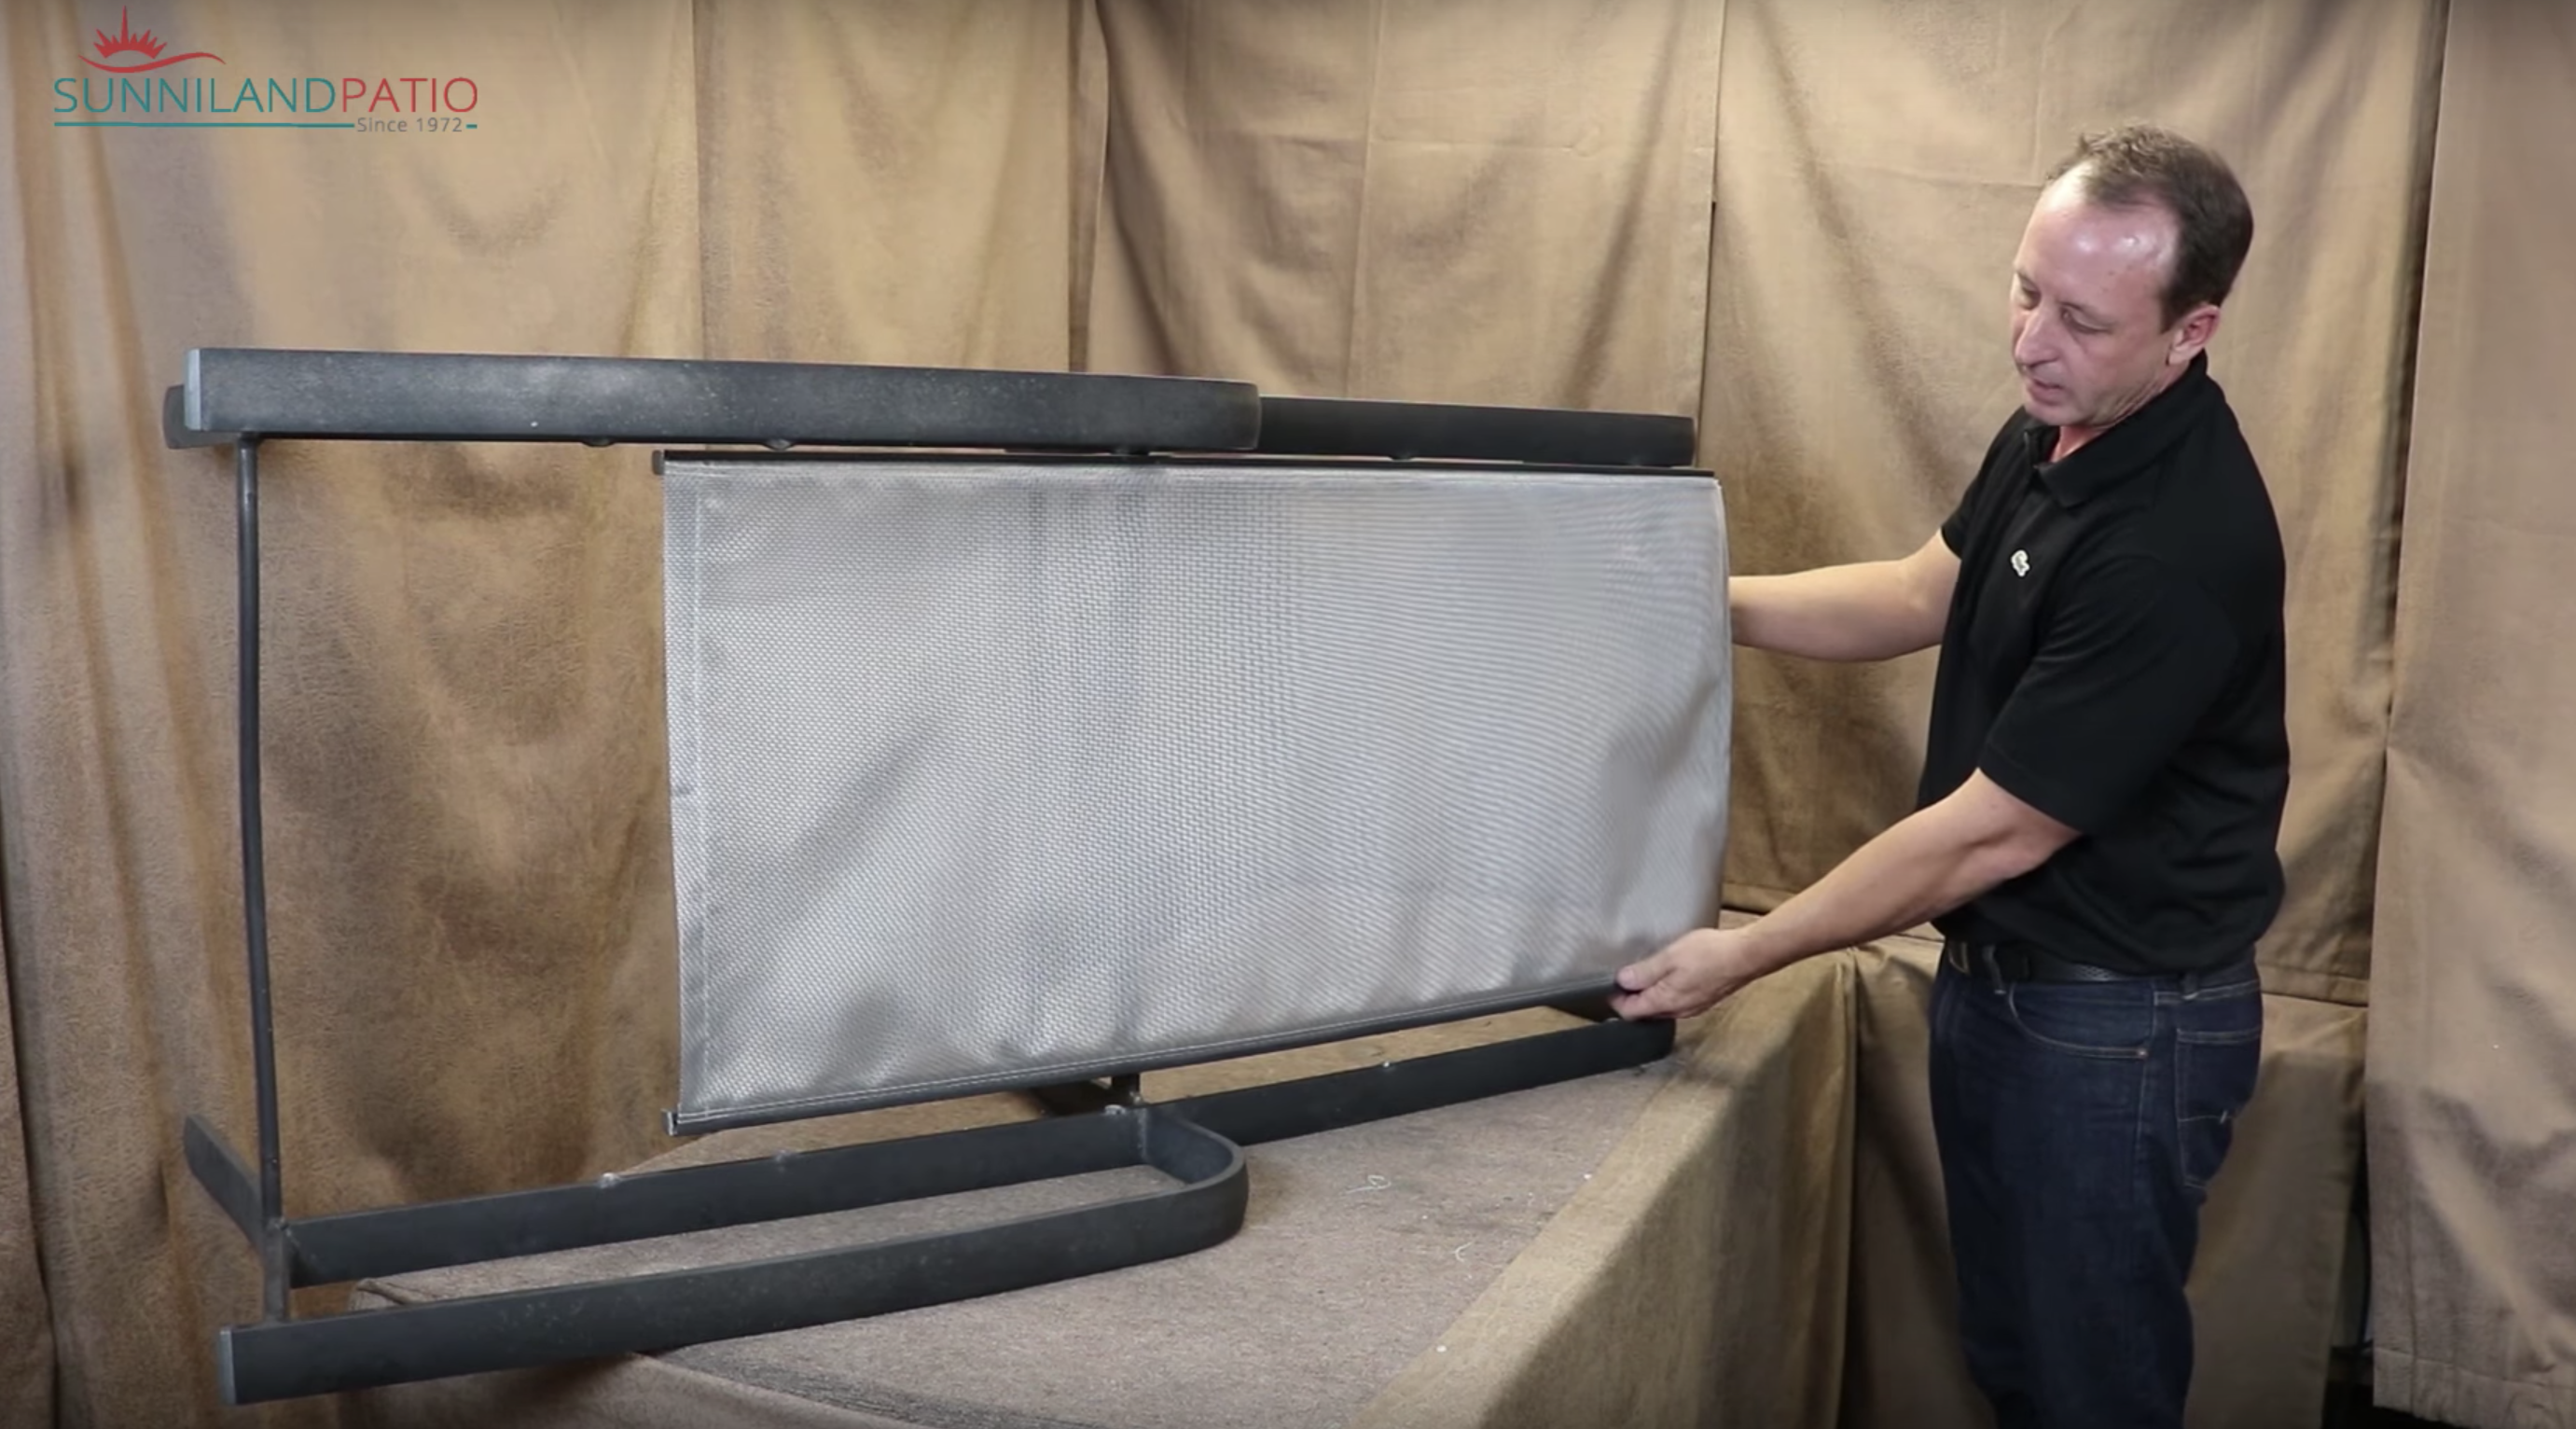
Next, insert the new sling on the seat frame. Slide the seat sling into the rail that you removed from the frame, and then slide it on the rail that is still screwed on to the frame as shown in the picture below.

After that step is done, we tighten the rail into the frame again by screwing it back on.
Lastly, install the back frame again into the main frame by screwing the parts together, same procedure you did when you unscrewed the back frame from the seat frame.
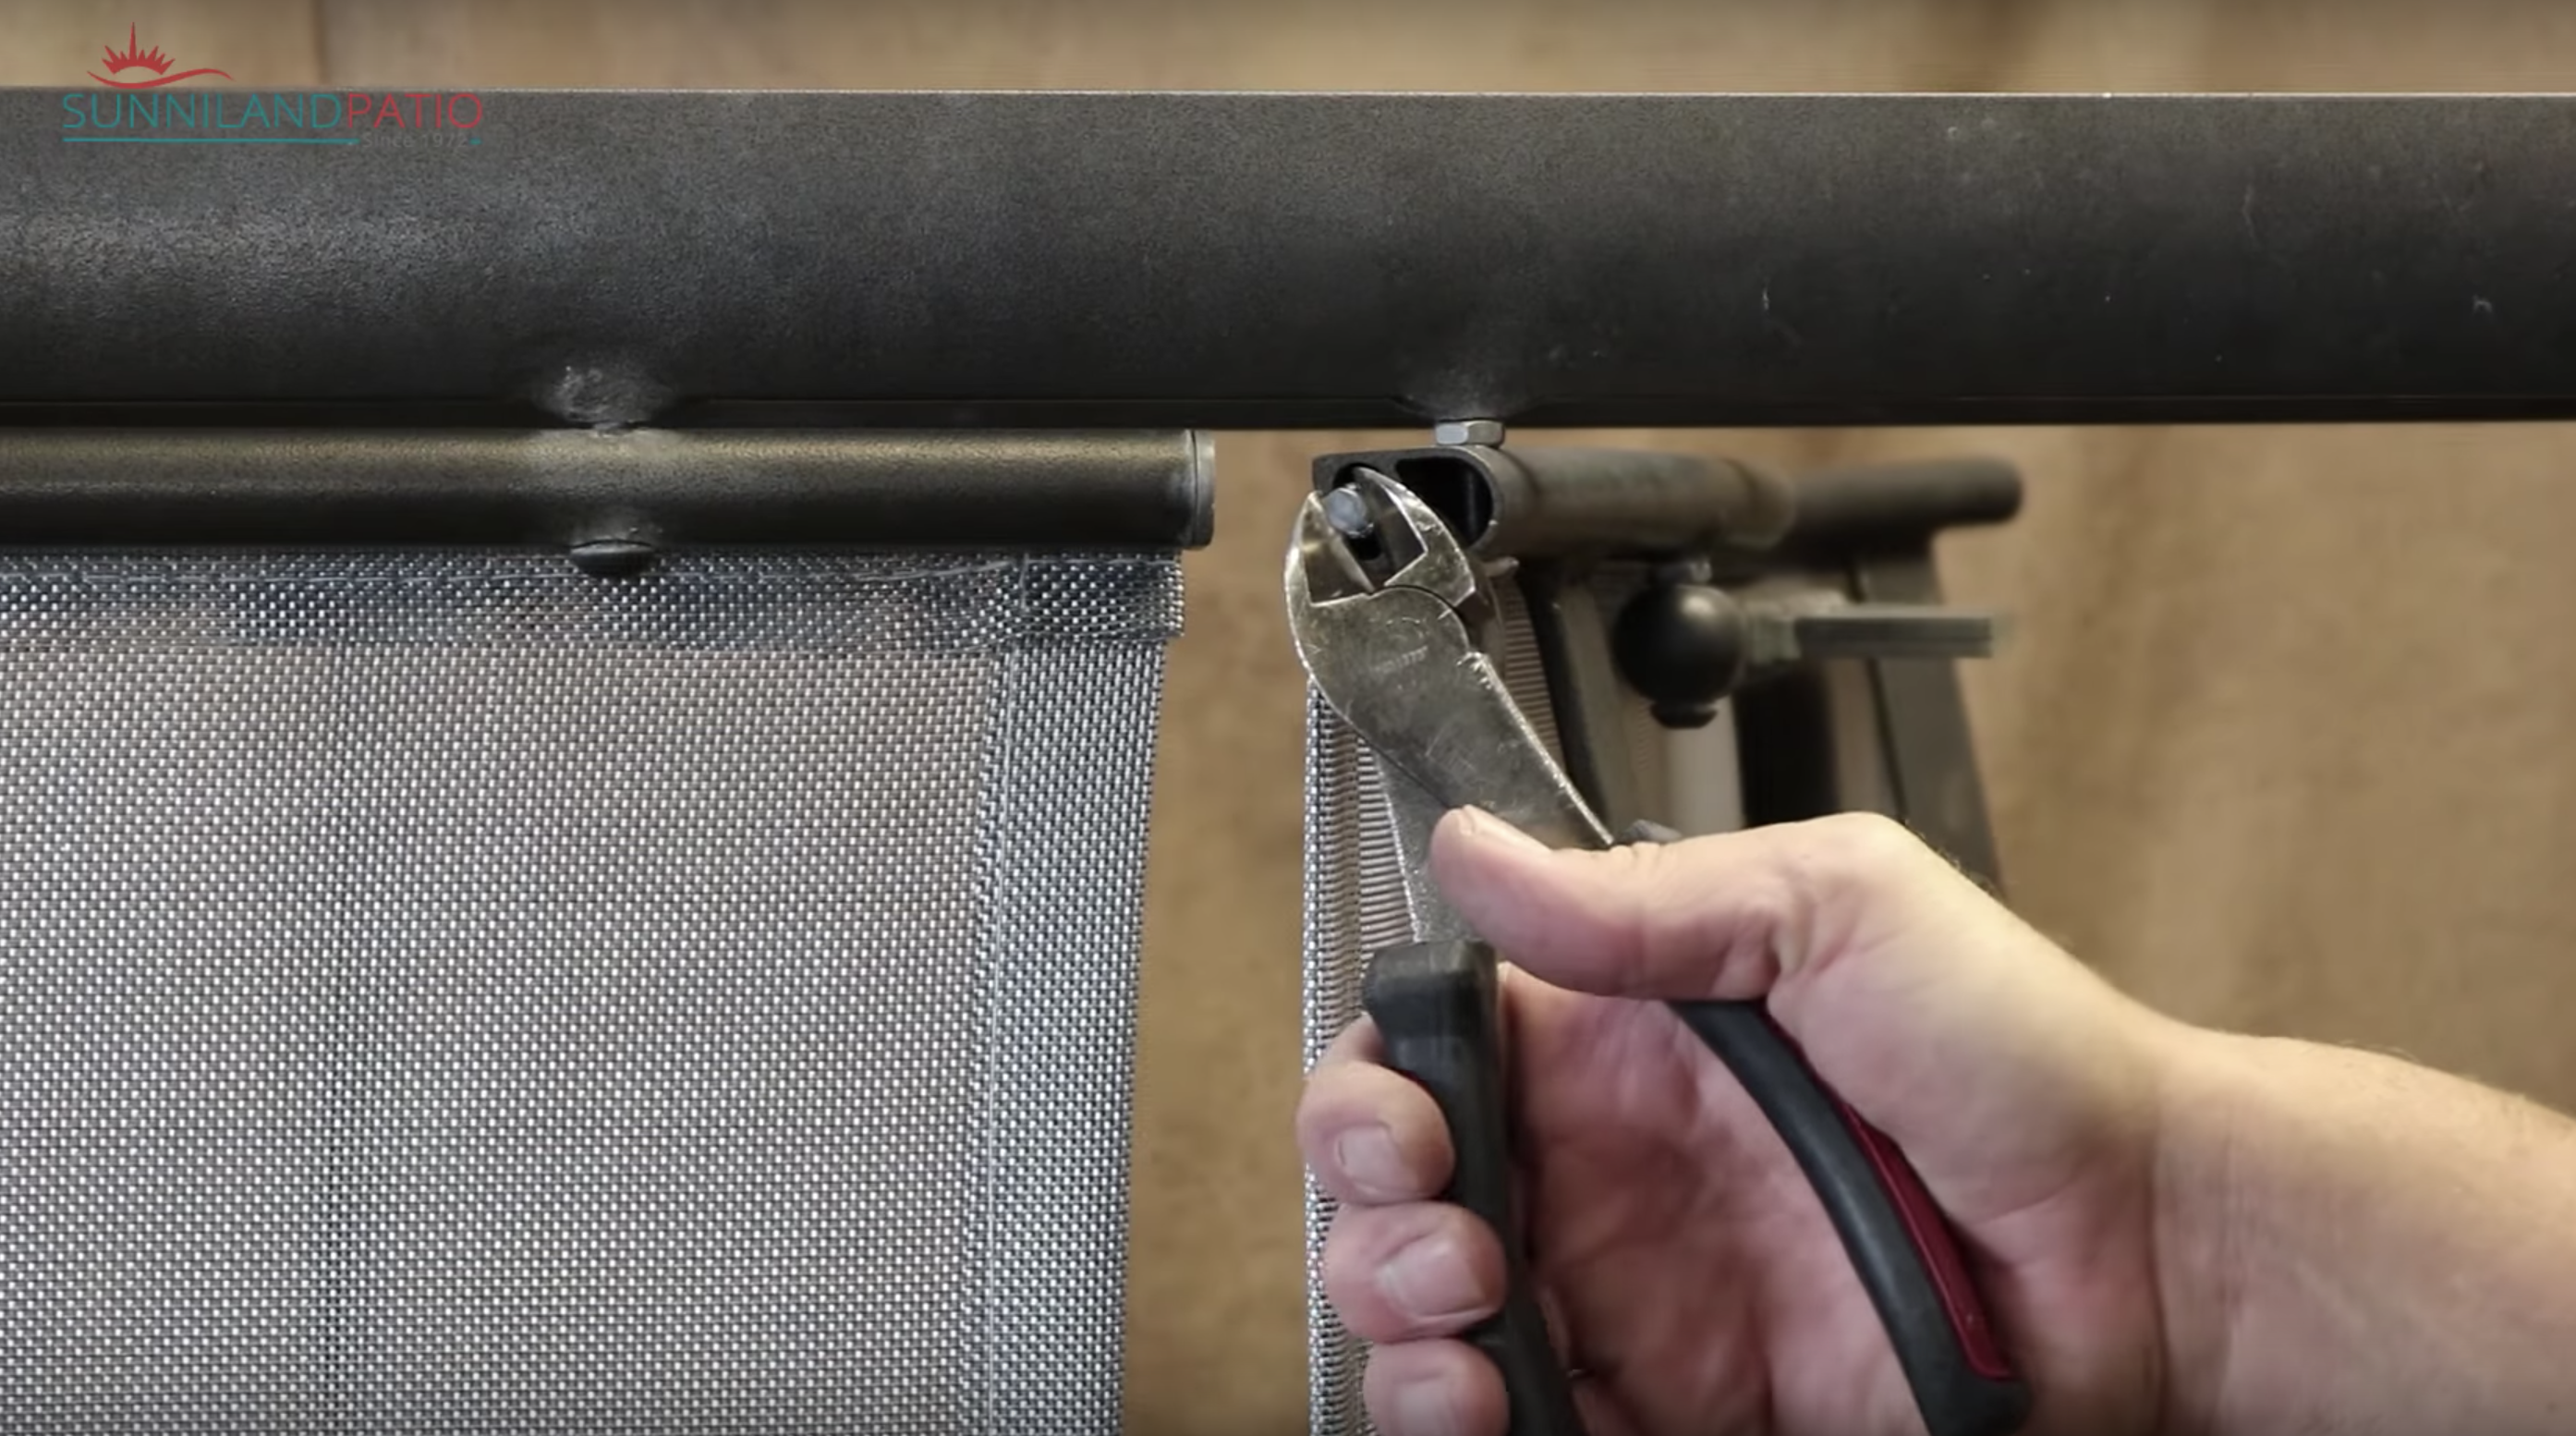
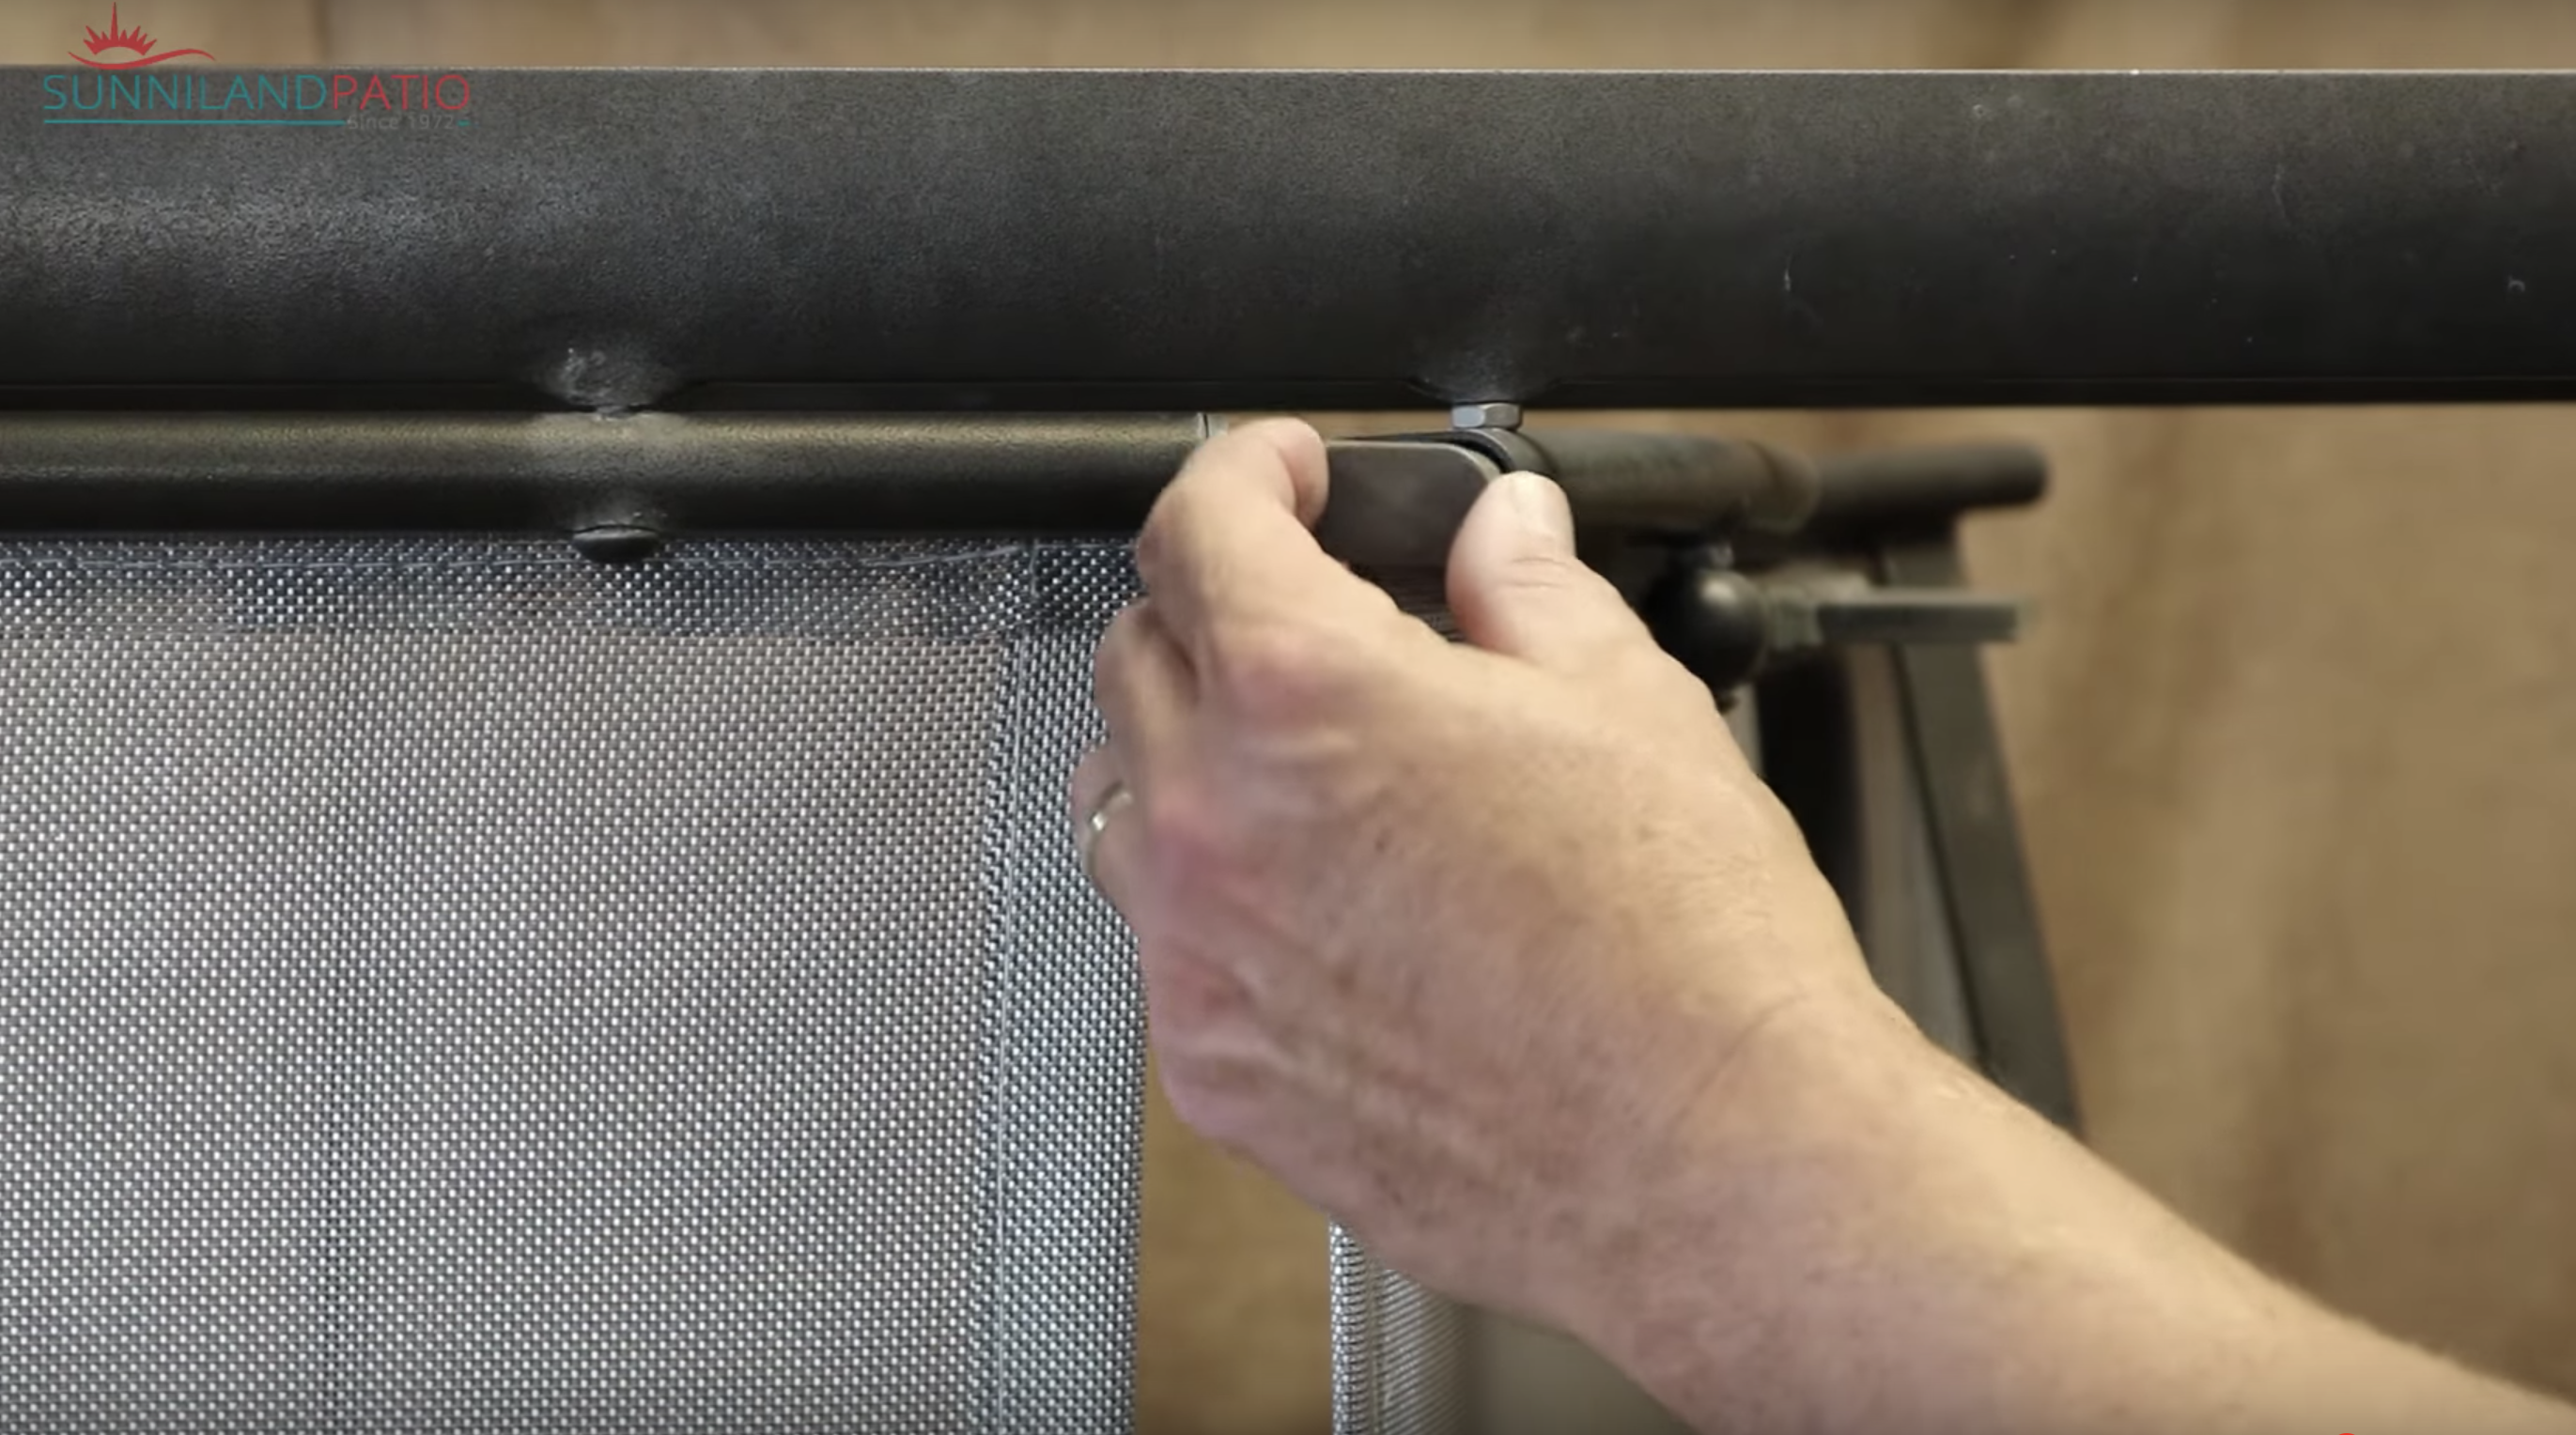
To end your project, grab a pair of scissor pliers and pull the edge of the dowels about an 1/8 inch and cut it flush, thatll help you make sure that the end caps will fit snug. Do this to all the ends points in the sling, and then insert each end cap into the frame as before and tap them lightly with a hammer.
Thats the end of our tutorial! By now you should have a brand new sling installed!
If you need slings, heres where you can get them.
And if you have any questions simply send us a email to sales@sunnilandpatio.com or leave a comment below.
Happy Fixing!